Alternator upgrade - 90 amp

Gotta love that wiring . . .
Post Reply
eddie124

Alternator upgrade - 90 amp

Post by eddie124 »

Hi all,

Just thought I'd share my experiment with you, as the original teaser that led me to this project was the Ford conversion which I've read about here.

I've been looking at options locally and I found a 90 amp alternator out of a Fiat 16v Coupe (the 90s Pininfarina model) that looks like a suitable candidate, and I got one that I'm now going to recondition so I can convert my car.

As an aside to this, I must mention my car is one of the rare pre-series 124 Spiders that came off the factory with a dynamo, the alternator only came as stock fitment from chassis #0000741, signalling the end of the pre-series run (mine is 0000671).

Image

Running a car on a daily basis like I do with a 28 amp dynamo is a nightmare, especially if you've added a few modifications to enhance its daily driver abilities like an MSD ignition, halogen lamps, electric fuel pump and a radio (kids pester me for music all the time, my music comes from the engine compartment). Add into that equation some town driving with the engine continually at low revs and you get a recipe for a flat battery in no time at all.

So this monster will soon be out and onto a shelf:

Image

I was going to post actual photos of the one I got but photobucket seems to be a bit slow at the moment, so I'll add them later. The brackets are similar to actual Fiat 124 items, so it looks a good bet. Also, a quick measure of the shaft when I opened it today makes me suspect it is identical to the original items fitted to 124s. I already sourced an original pulley from an alternator pulled off a 125 I broke for spares recently, so we're in for some work now.

Anyone done similar conversions?

Cheers, Eddie
baltobernie
Patron 2020
Patron 2020
Posts: 3466
Joined: Sun Nov 25, 2007 6:00 pm
Your car is a: 1973 Spider [sold]
Location: Baltimore, MD

Re: Alternator upgrade - 90 amp

Post by baltobernie »

I've not done this conversion, but the only concern I'd have is bypassing the Fiat voltage regulator. I think there are threads on this subject, enabling you to retain the Fiat red charge lamp in your tach.
eddie124

Re: Alternator upgrade - 90 amp

Post by eddie124 »

Hi Bernie,

No point in going through those instructions for me as my electrical setup is different due to the dynamo and its regulator being a totally different ball game.

Here's the promised pictures of the alternator:

Image

Image

Shape-wise, it's very similar to a stock 124 item, so I'm hoping it will be easy to fit. And since the 16v Coupe is a direct mechanical descendent of the 124, its engine still a Lampredi twin-cam, I'm hoping the dimensions will be compatible.

I'm going to remove the serpentine-belt pulley tonight and see if the early pulley is a direct transplant or needs modification, will report later on my findings.

As a side note, I got this alternator from someone breaking a Coupe for spares at 40 euros including shipping, so not bad. It looks worse than it is, so with a good spruce up I'm hoping it'll be fit for business.

Cheers, Eddie
eddie124

Re: Alternator upgrade - 90 amp

Post by eddie124 »

Quick heads-up:

The pulley is still not out of the beast, as this one ain't indexed to the rotor with a woodruff key like the old ones. Turns out it has a hex socket on the tip so I need to grab it with an allen wrench while I undo the nut with a 22 mm ring spanner, which I don't have but will get tomorrow.

Image

In the meantime I've already got its rear cover off and the regulator out. Since the brushes are getting a tad short I'll replace the lot as a precaution. This is quite simple to wire up as it just has a big terminal to the battery and a little one for the charge lamp on the dash. Easy peasy. Now I'll just need to figure out how to safely tuck away the redundant wiring for the dynamo.

The lower supports are exactly the same size and spacing as the 124 items. The upper one is not exactly opposite the lowers like the old unit, but a little more outwardly oriented (relating to an exhaust-side assembly on my early engine, would be closer to the engine on a later unit when mounted on the intake side).

Image

I'll be back with more news soon.

Cheers, Eddie
eddie124

Re: Alternator upgrade - 90 amp

Post by eddie124 »

Well, after a major battle with the nuts and bolts, I finally got so mad I cut the bolts holding the armature with the grinder. This thing was seriously seized, I've never had this much trouble opening up the old ones!

Anyway, after all this struggle, I've finally had it revamped and now, all pimped out and with a fresh set of nuts and bolts, we're ready for the tech bits.

Image

Image

A few measurements later...

Image

I got the data from both to see if I could actually replicate the correct positioning of the pulley. As it turns out, the old one has a 15 mm shaft, and the new one measured at 16,95 mm approx so I had the pulley enlarged to 17,0 mm.

As for the rear, on the back of the stock Fiat pulley the hub protrudes quite a lot from the inside plane. This was required on the old one as the mating surface for setting the back of the pulley was only 3,5 mm above the outer surface on the front end of the alternator. The new one's decking height is 15,5 mm above the surface.

Since the lower bracket is just 0,5 mm off (the thickness of the original one is 17 mm, and the new one gave 17,5 mm, I had the machine shop waist the rear of the pulley's hub 12,5 mm to compensate. There is more than enough metal to do this.

I've just got it back but the batteries on my camera are still charging, I'll post them later. The fit is absolutely perfect, and it clears everything spot-on. The diffuser pads actually run quite close to the surface as they would on the original, but are not in risk of hitting or catching anywhere. My fear was just that they might catch the above-surface bolts I used on the front hub of the shaft bearing, but they clear ok.

The regulator and brushes on this unit are a single piece, not sold separately. My local Fiat dealer said it was listed at roughly 130 euros, so I dropped out. After some digging on eBay, I found a supplier in the UK that had these in stock (non-OEM, obviously), and it came out at just under 12,5 GBP, so not bad.

More updates later.

Cheers, Eddie
User avatar
manoa matt
Posts: 3442
Joined: Thu Oct 26, 2006 4:28 pm
Your car is a: 1978 Fiat 124 Spider 1800
Location: Honolulu, Hawaii

Re: Alternator upgrade - 90 amp

Post by manoa matt »

That voltage regualtor looks like the ones on the 55 and 65 amp alternators used on later Spiders. If so, you should be able to pic one up at your local auto parts store for around $25.
eddie124

Re: Alternator upgrade - 90 amp

Post by eddie124 »

The pulley went in a treat, nice and snug, and doesn't foul anything, it looks absolutely spot-on:

Image

Image

Now I've got to get it cleaned up and painted, and do the final assembly on the whole set.

The difference in pulley length does mean I have to add a few washers, but luckily I found some brand new M16 washers in my stock that are a perfect fit:

Image

Now all that's left is to decide what to do with this old friend:

Image

This is the regulator for the dynamo, an extremely rare part that took me ages to find (the car came with an unoriginal part from an Alfa). I was thinking of leaving it in place (so as not to be such an obvious mod, I like being discrete about non-original stuff on the car) as there are a couple of wires that need to be joined here, but this bugger takes up a lot of space (and makes adjusting the idle a bit more difficult than it should be), so it might end up joining the dynamo on the shelf. What would you do?

Cheers, Eddie

P.S.: Hopefully this weekend I'll get it in the car, tonight I'll get the pulley stripped and painted, and review the alternator's assembly.
baltobernie
Patron 2020
Patron 2020
Posts: 3466
Joined: Sun Nov 25, 2007 6:00 pm
Your car is a: 1973 Spider [sold]
Location: Baltimore, MD

Re: Alternator upgrade - 90 amp

Post by baltobernie »

Great looking job, Eddie. I can see that keeping the car looking as original as possible is important to you; I share that feeling. But maybe that "extra" regulator could cause a problem if a mechanic was attempting to work on your car not in your presence. Perhaps that rare item would be prized by another owner restoring his Spider?
eddie124

Re: Alternator upgrade - 90 amp

Post by eddie124 »

Thanks Bernie,

The chances of a mechanic working on my car without my presence are slim if not altogether impossible, as I am my own mechanic (and electrician). I used to farm out heavier jobs to my local Fiat dealer as there were still some old-school mechanics working there, but the last one has now retired, so I'm on my own. Not that I lack the confidence, I just need the proper gear, but I'm slowly getting my garage equipped...

Anyway, since I am of the "keep it reversible" school of thought, the regulator will either stay there as decoration or it will join the dynamo on the shelf. I do have a spare NOS one I could sell, though, but there aren't that many pre-series cars around, and even less still with their original dynamo fitted, so maybe there isn't much interest anyway.

Cheers, Eddie
eddie124

Re: Alternator upgrade - 90 amp

Post by eddie124 »

Hello all,

Well here's the lowdown on the actual conversion, it's finally (almost) done.

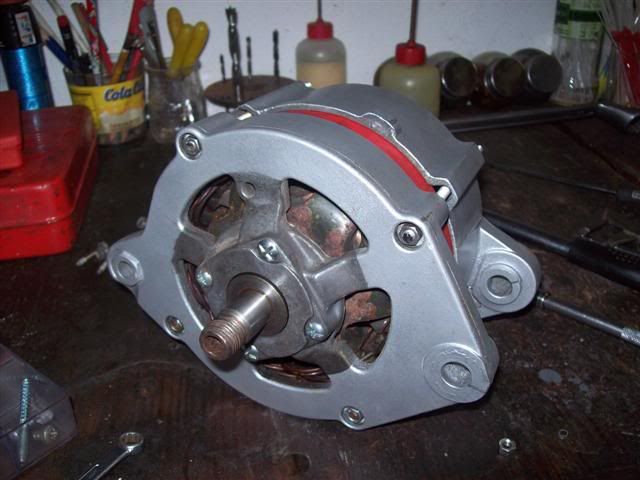
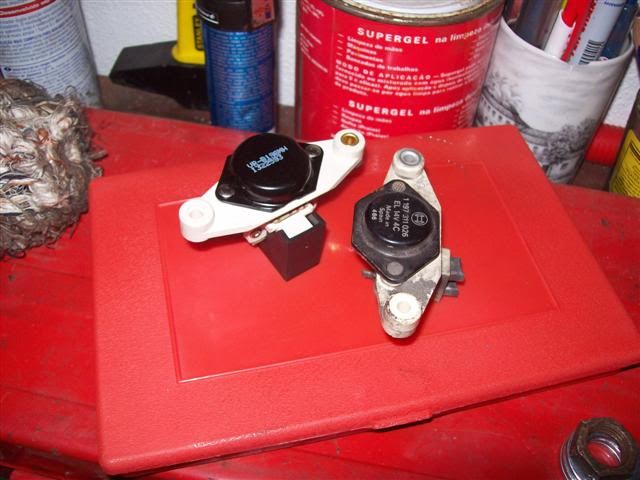
Last week the new regulator/brush set arrived. You can see it here, but it's still wearing its protective cap over the brushes:

Image

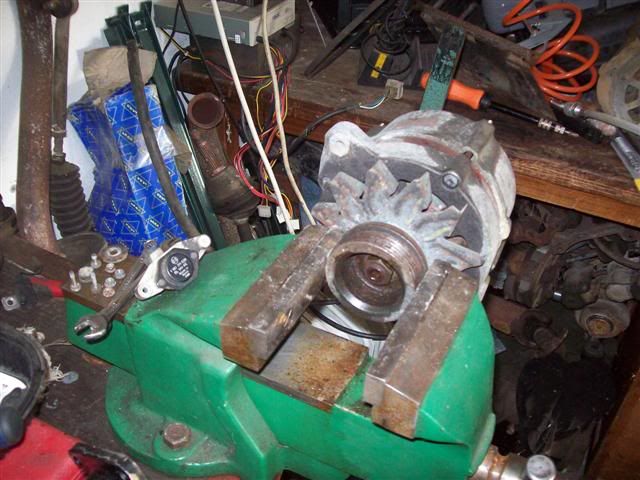
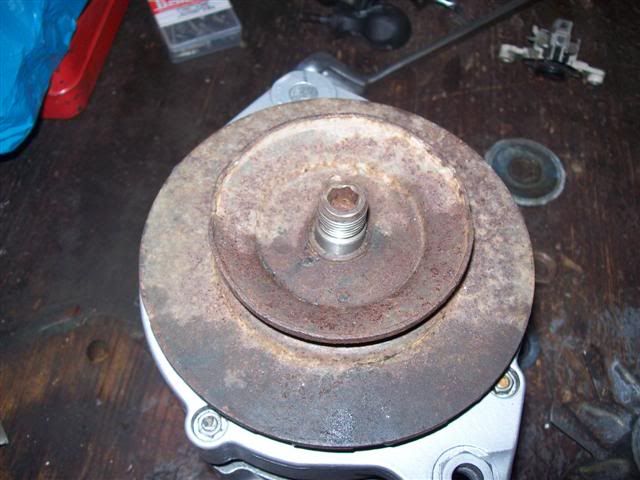
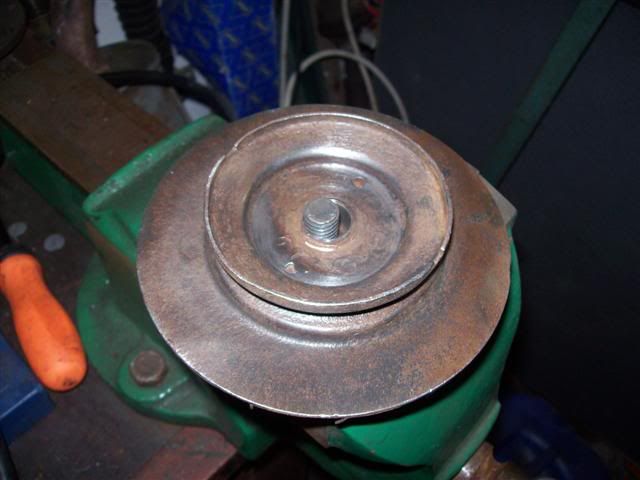
I cleaned up the pulley using a wire brush that attaches to the power drill, and it shifted the rust and remnants of the original paint quite well:

Image

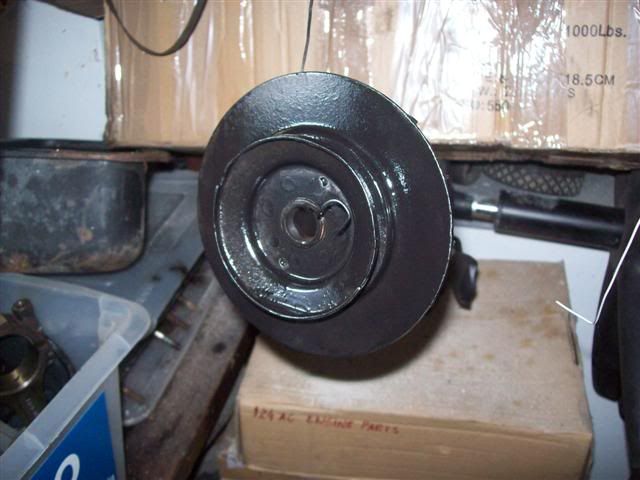
A quick spruce up with paint followed:

Image

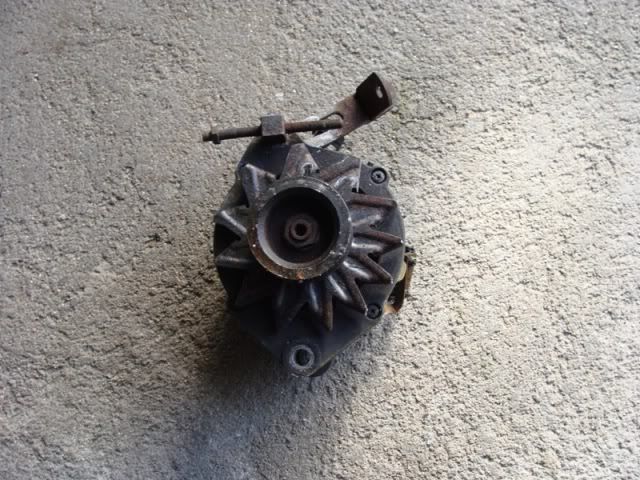
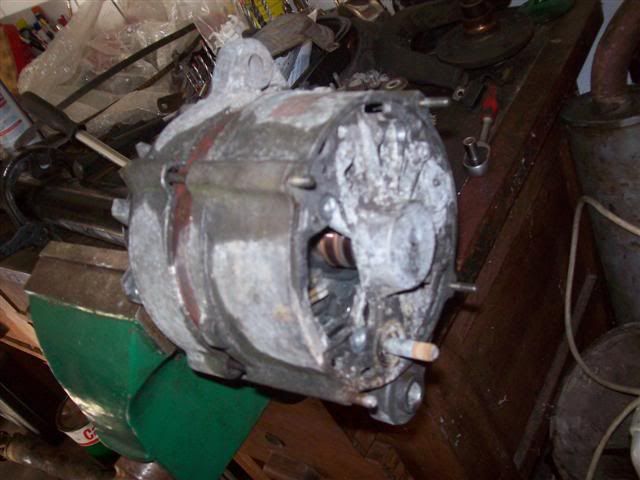
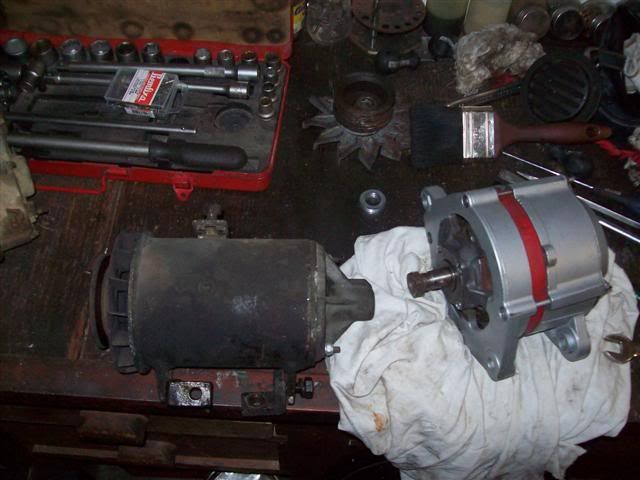
While the paint dried, I started the eviction of the dynamo (generator to you US folks, I've just remembered):

Image

Here they are on the bench side by side. The dynamo is pretty heavy, as its armature is iron, not aluminium like the alternator. You can see the mounting brackets are different too, but luckily I had a proper mount in stock.

Image

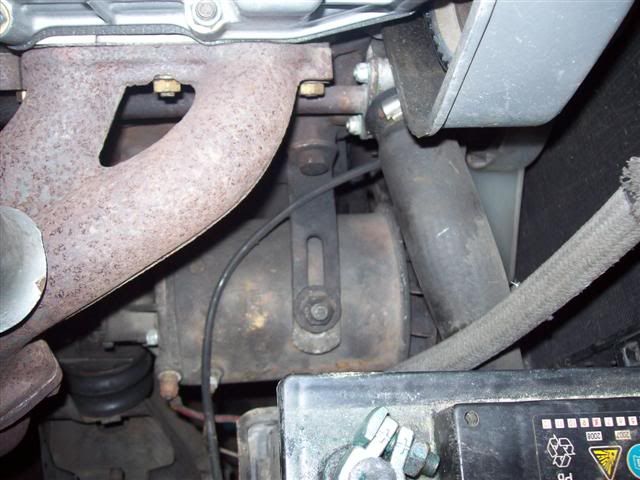
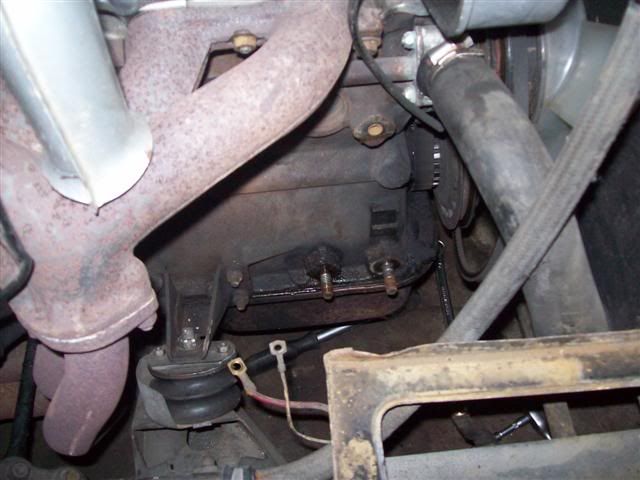
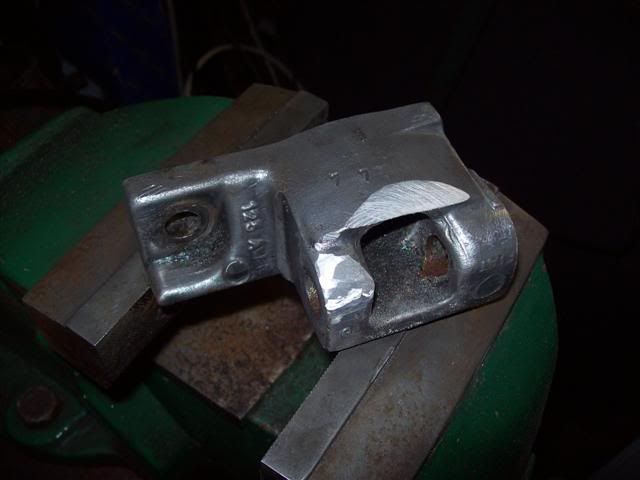
Here's the bracket in place:

Image

After getting it on, my first worry was the alignment check, and it seems ok. I still suspect the alternator pully may be a bit forward in relation to the other two, but it's a minute thing, or maybe it's just me. I'll get it checked later.

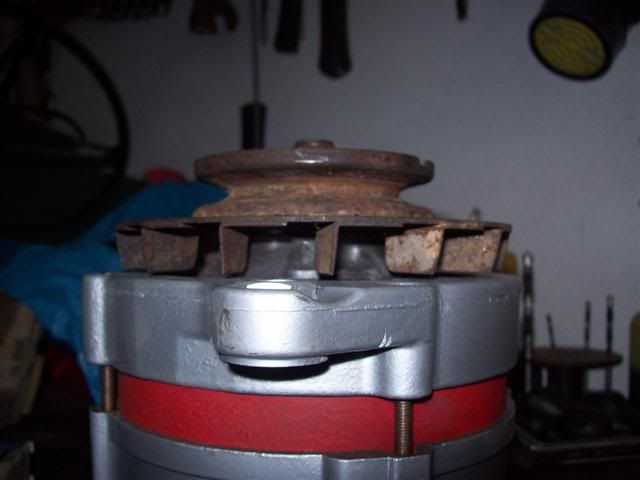
After slotting the lower bolt in place, the alternator would not move. After getting it out, and the bracket too, I found that it needed some trimming as this modern unit is a bit wider than the original ones, so I modified it with the angle grinder and later refined the cuts with the Dremel.

Image

This still wasn't enough, as the alternator would stick and wouldn't go all the way towards the engine block, and in fact it wouldn't even reach the point where the upper bracket for adjusting tension would end.

At this point I lost patience and transfered the whole setup to another engine block I have completely bared for another rebuild (for a friend's car), and mocked it up there:

Image

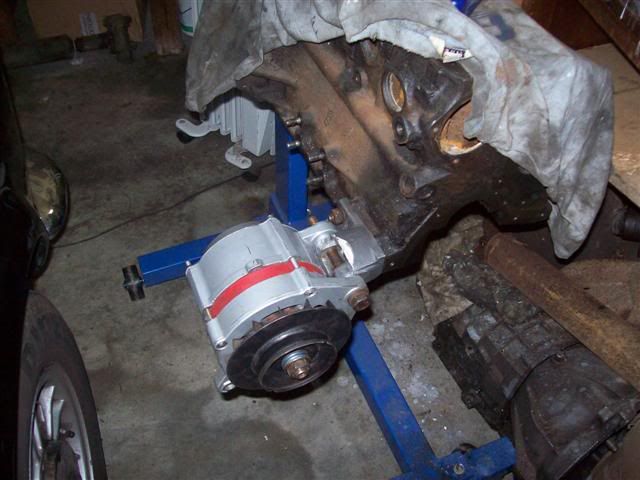
I needed to round off the rear end a bit more, but above all it needed skimming a touch more on the top part. After this, it went on fine, apart from the belt being so tight that I couldn't get it over the pulley, so I got it on the pulley groove before fitting the lower bolt. This still left a tiny bit of adjustment room, so it's not excessively tight.

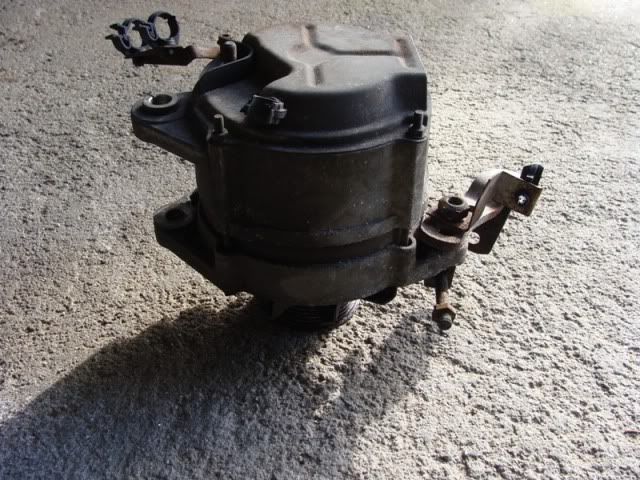
The upper bracket was also spaced out a bit, a necessity for clearing the extra girth of the new unit, and also a spacer on the top bolt as the bracket is a bit more forward than it should be:

Image

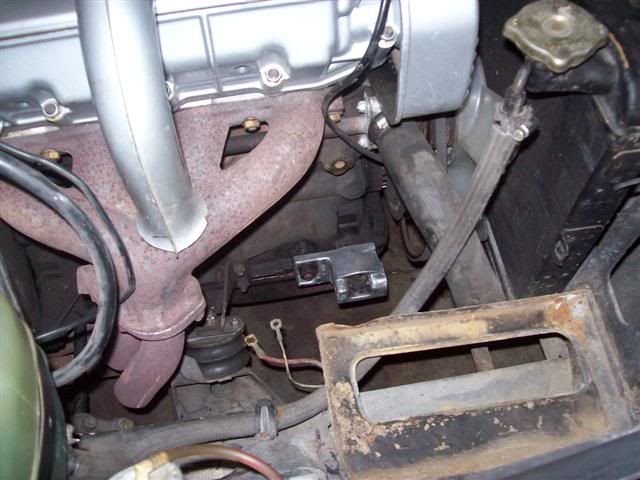
After this, I got on with the wiring. The rewiring was not complicated, I just needed to keep two brown wires together as they were the original connection from the ignition switch to the regulator and from that to the starter's solenoid, and another set of wires paired was the incoming white line from the dynamo that was bridged with the outgoing black line to the charge light on the dashboard. You can see here one of the pairs already isolated, and the other one already bolted up but still awaiting tape:

Image

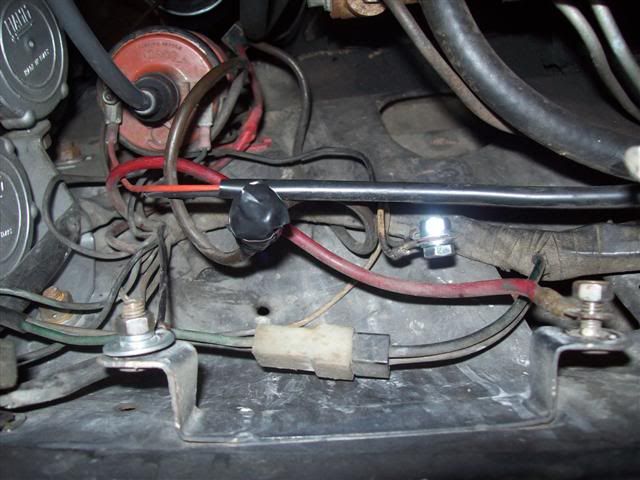
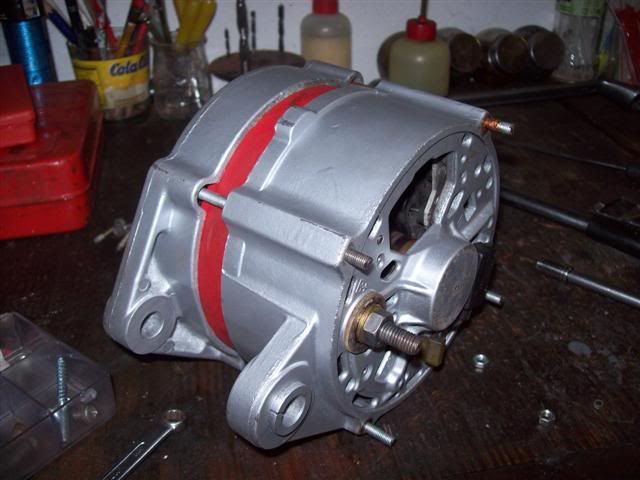
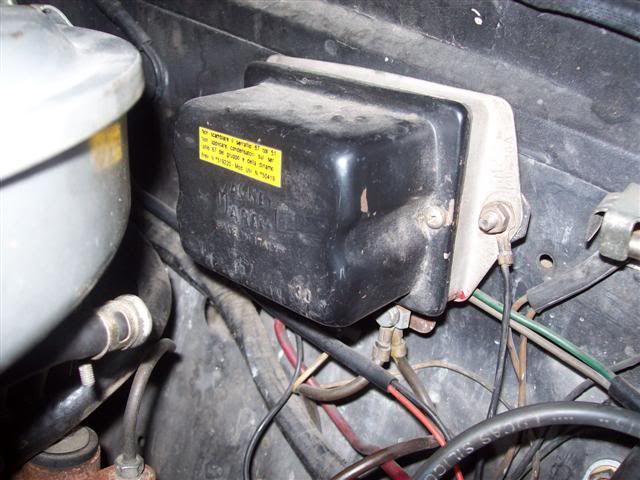
I ended up choosing to remove the regulator, as you can see above, the bracket is already cleared. There was another redundant wire, the thick red that used to come from the dynamo to the regulator. As I intend to keep all the work reversible, I just bolted it to the bracket on this end and to the alternator's back cover as an extra ground, so it's redundant but not flying around the engine bay, and it stays where it belongs.

I got the charge line from the alternator running directly to the battery via a heavy gauge wire, and from my stock I got a terminal protective cover to get it as tidy as possible:

Image

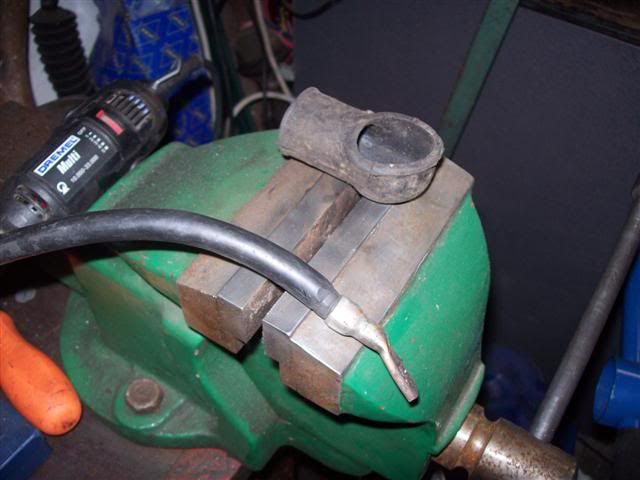
I also ended up using a bit more to reinforce the original ground wire, as it was a bit thin. You can see here the original over the vice and the new wire leaning on the left side:

Image

And after that, we're done:

Image

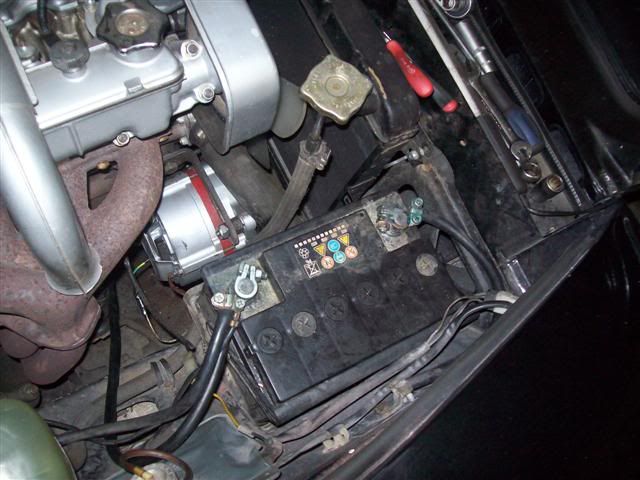
I got the thing running, but the charge light wouldn't go out. I already expected this as the charge light circuit on this car has a very low resistance (measured at 20 ohm), so I need to get this changed. After revving the engine a bit, I got it out and it stayed like that afterwards, so it's really just a matter of getting this right. I'm going to check with my friend over at the local Fiat dealer for the proper resistance needed, so i can get this sorted out.

After getting the light out, I measured the current at the battery terminals and it read at slightly above 14,5 V with the engine just above idle speed (the choke was on). No further testing was done as it was damn late (finished at 3:50 am) and I was freezing (outside temp was nearing 0 deg. C) as I needed the garage open because of the exhaust fumes.

So there you have it, the conversion is not very hard to do. If you have a normal production Spider it would be even easier, it just takes a bit of machining to the pulley and some grinder work on the mounting bracket.

Hope you enjoyed this as much as I have enjoyed doing it! I'll give some impressions later as the car gets some use (it's raining now, and will stay that way for a few days if the forecast is to be believed, so no play for now).

Cheers, Eddie
baltobernie
Patron 2020
Patron 2020
Posts: 3466
Joined: Sun Nov 25, 2007 6:00 pm
Your car is a: 1973 Spider [sold]
Location: Baltimore, MD

Re: Alternator upgrade - 90 amp

Post by baltobernie »

Good job, Eddie!
You could also use a 1N5404 or 1N5408 diode in the exciter wire. This serves a dual purpose; dropping the voltage 1.2V to enable charge sense, and prevent backward flow to ignition. Just remember to place it after the fuse block, and point the stripe towards the alternator.
eddie124

Re: Alternator upgrade - 90 amp

Post by eddie124 »

Hi Bernie,

Well it seems I'm going the wrong way. I've had a chat with my friend who is well versed in these components and he says it's the wrong way around as my lamp hasn't got enough power (meaning lower resistance), it should use a bulb between 3 and 5 W (I thought it was 3 but I later recalled they're usually 2W in the dash). This means lower resistance, so it doesn't need to rev the engine higher to get a signal... it's probably down to this already being an electronically regulated unit.

We'll see later tonight if this works, I'll keep you posted.

Cheers, Eddie
eddie124

Re: Alternator upgrade - 90 amp

Post by eddie124 »

My friend was right on the money!

I got a 4W bulb from my spare lot and put it in there... hey, presto! - the light went out immediately on startup, and stayed that way even with a low idle, only blinking when I pushed the choke knob all the way home on a still cold engine.

Driving impressions will have to wait though, as the weather is miserable right now...

Cheers, Eddie
User avatar
124spiderman
Posts: 106
Joined: Sun Jun 08, 2008 11:43 pm
Your car is a: 1973 CS Spider
Location: Sydney - Down Under

Re: Alternator upgrade - 90 amp

Post by 124spiderman »

What a terrific thread. Any chance someone can help me upgrade my '73. I have A Marelli alternator later type with built in regulator (from a 1.8 twin cam 131 Fiat) and would like to replace the original Marelli alternator with the external type regulator and alternator light relay.
Has anyone attempted this. Can someone post instructions as this would help me significantly. :D
owned: 850, 124S/AC/BC/CC,128SL, 125S, 600D, X1/9, 2300, 131, 132, Uno, Punto
I own: 124CS, 500F, Bravo Sport T-Jet
I want to own: 8V, DINO SPIDER/COUPE, ANY ABARTH, '54 FIAT-TURBINA
eddie124

Re: Alternator upgrade - 90 amp

Post by eddie124 »

Hi there,

Wiring an internally-regulated unit couldn't be simpler. Basically all you need is the big terminal wired to the battery (using a heavy-gauge wire), and the wire on the small terminal goes to the charge light on the dash. The other wire going to the light must come from the battery positive terminal, wired via the ignition switch. If you look at your car's wiring diagram you'll quickly figure out which one it is.

The basic principle is that, if no charge is being produced, there's current flow across the light as the terminal on the alternator will accept it, so the light turns on. When the alternator is producing current, the signal is matched on both ends so there's no flow and the light stays out. That's it, really.

There's a thread around here somewhere explaining the wiring mods required to a standard production car in detail, but that's basically it.

As an aside, I must add that this mod has now been running for a year and it's absolutely brilliant. I've never had any worries since, the alternator runs brilliantly and the electrics love it. Rainy days are not usually something I endure with my car, but a couple of weeks ago my wife's modern was out for a clutch job so I was forced to drive it daily in rainy weather and the electrics were the least of my worries. I had the blower fan, lights, wipers and radio on (with the kids), and everything ran absolutely fine.

Cheers, Eddie
Post Reply