Page 12 of 16
Re: 1978 rolling restoration
Posted: Fri Apr 20, 2012 9:21 pm
by jimmycakes401
I'll be hitting that facebook group right now.
Still trying to talk my wife into bumperettes. She likes the idea of having full bumpers for safety sake...
Re: 1978 rolling restoration
Posted: Sat Apr 21, 2012 7:43 pm
by DocGraphics
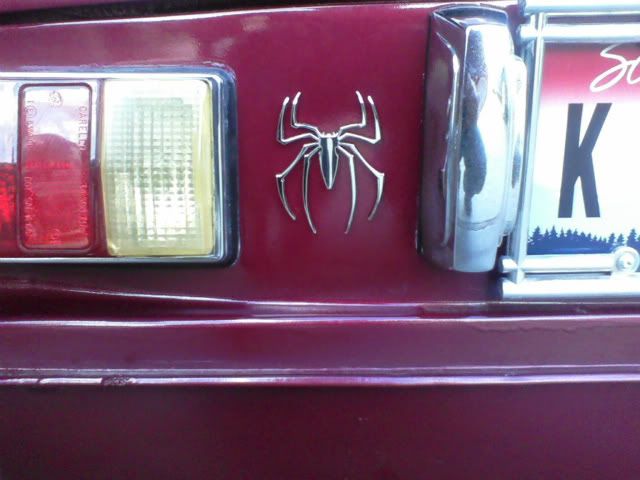
Playing out in the garage today & finally put on the Spider badge I found a while ago...looks cool
Re: 1978 rolling restoration
Posted: Sat Apr 21, 2012 7:48 pm
by RRoller123
very cool!
Re: 1978 rolling restoration
Posted: Sun Apr 22, 2012 11:29 pm
by 124JOE
if they all came with that spider
it would be the one marked as "MOST STOLEN"badge
Re: 1978 rolling restoration
Posted: Wed Apr 25, 2012 12:58 am
by happybeachgoerm
BUMP! lol

VERY NICE Build! I do want to know if anything else has been going on with your "GF" lately? also u mentioned u had spacers under your wheels? how thick are they? i want to get a set of the Silver Wheels like yours..they are decently priced.
Re: 1978 rolling restoration
Posted: Wed Apr 25, 2012 1:41 am
by DocGraphics
I didn't use the spacers (stock 3/16") when I put on the new wheels, wasn't sure if I could use the locating bolt w/ the new wheels so I left them off, wheels fit perfect without & look sweeeeet!
Lots of new parts for my girl sitting on the bench, I will be starting the process on the engine this weekend by getting the 32/36 DFEV installed (pending a few parts arriving) the other upgrades (4-2-1 manifold, timing belt, all new hose, elect ign & strip emissions) will come in a few weeks after Alvon comes thru, want to show the car off & not sure how long all that will take.
Not sure if Alvon got my info for contact when he is in town (missed posting it till after he started his adventure, thought it started later), but I am sure I can find him when the caravan comes thru & stays the night. Really hope I can make it happen.
Have been replacing alot of little things too like heater fan switch, wing window latches, shift boot retainer....
While I'm into the engine I will clean & detail the engine compartment.
Still have to put the new shocks on too & cut the rear springs to match the front & get alignment.
I need to get the carpet into the trunk, Oh & change the clock out to a factory oil pressure gauge too.
Almost forgot I have Abarth style bumperettes, front spoiler & new front marker/blinker lights to go on too
Lots of plans this spring before the real driving season is here, probably do it all in sections so I can drive her a bit in between.
Re: 1978 rolling restoration
Posted: Wed Apr 25, 2012 9:18 pm
by happybeachgoerm
your carpeting your trunk?? but didnt u stain the wood and made it look all rpetty? why dont you just clear it and keep it?? i like the way it looks! you have an amazing car and i hope that one day my car will look as good as yours and many others on here do!
I cant wait to sell my Vette and start building my FIAT!!!

Re: 1978 rolling restoration
Posted: Thu Apr 26, 2012 4:38 pm
by DocGraphics
Yes the wood looks purdy in the trunk but without any traction back there items in the trunk become missles during any kind of spirited driving.
When I bought the carpet for the inside I bought enough to do the trunk too so it will all match.
Yes I did use deck stain/sealer on the wood panels, more as a sealer than anything but can't complain about how good they look.
Heres a pic from foster48x's trunk that is my inspiration, except mine will be the same corn row carpet as the inside.
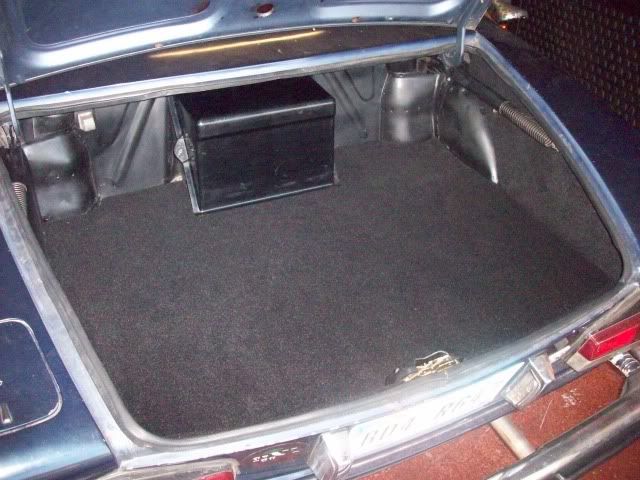
Here is a link to the whole thread he did on his trunk upgrade which is what I pretty much copied to fit my desires.
http://www.fiatspider.com/f08/viewtopic ... unk#p87397
Re: 1978 rolling restoration
Posted: Sun Apr 29, 2012 12:55 am
by DocGraphics
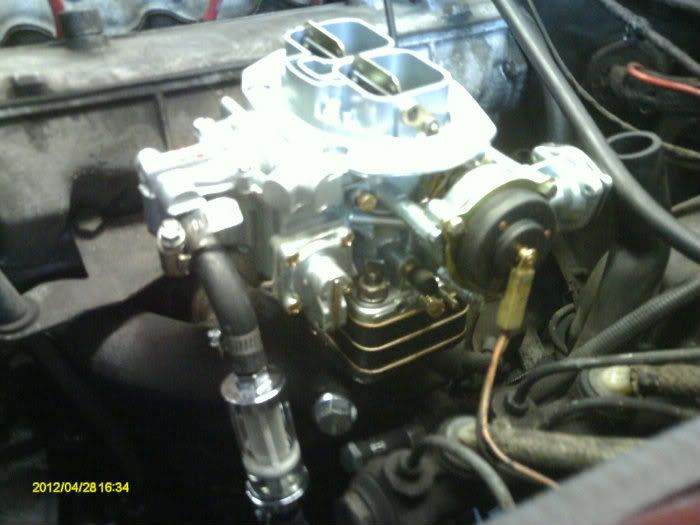
Well the rest of the carb parts showed up today & it's installed!!!!
Revs like a SOB especially when the secondary is opened.
Haven't took her out for a test drive yet, that will have to wait till tomorrow
With the double spacers from Mark it puts it at the same height as the stock carb & his new ball link for the throttle linkage hooked up great, though I did have to do the z-bend of the stock linkage bar (will change).
This carb adjusts nicely, the mixture finds its sweet spot nicely, obvious within 1/8 turn!
You can see the spacers that add up to about 1 1/4" same as the ADFA base plate
I do still have a bit of a miss remaining at idle, same issue from last years problems but I am still thinking that is the ign, I have a elect ign to go in next.
Also removed all the emissions stuff. Wow that really emptied the engine compartment of clutter, still dirty but will clean everything when I put the new timing belt, hoses & exhaust on.
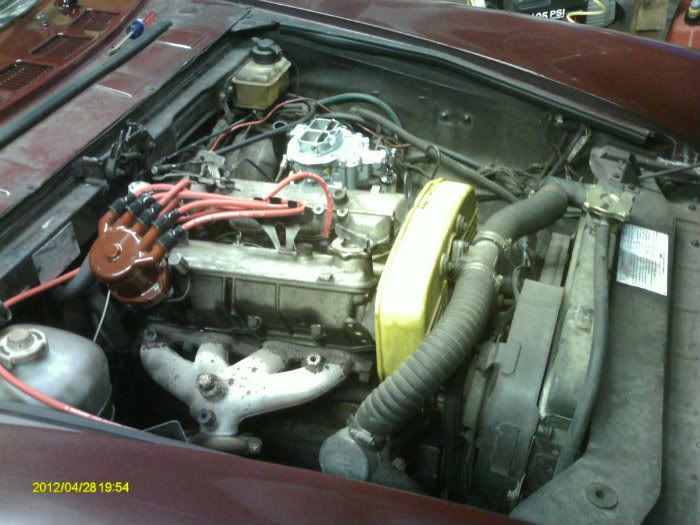
I will post my findings of the performance tomorrow! I'll put fresh gas in it & run the pi$$ out of her. I added Seafoam in the end of this tank to clean everything up before the swap (yes she needed a new filter before the swap & have another to go in with the fresh tank of gas).
Come on SUNSHINE!
Re: 1978 rolling restoration
Posted: Sun Apr 29, 2012 2:05 am
by blurple124
Just curious if you had any trouble getting that pipe off of the exhaust manifold when taking the emissions stuff off. Mine is absolutely SEALED in there, and I may have to resort to permanent damage to the component...
Any suggestions?
Re: 1978 rolling restoration
Posted: Sun Apr 29, 2012 2:35 am
by DocGraphics
The pipe to the exhaust manifold from the EGR valve was already removed when I got the car & the threaded part is still in there with the hole poorly (leaking) welded up, you can see it in this pic.
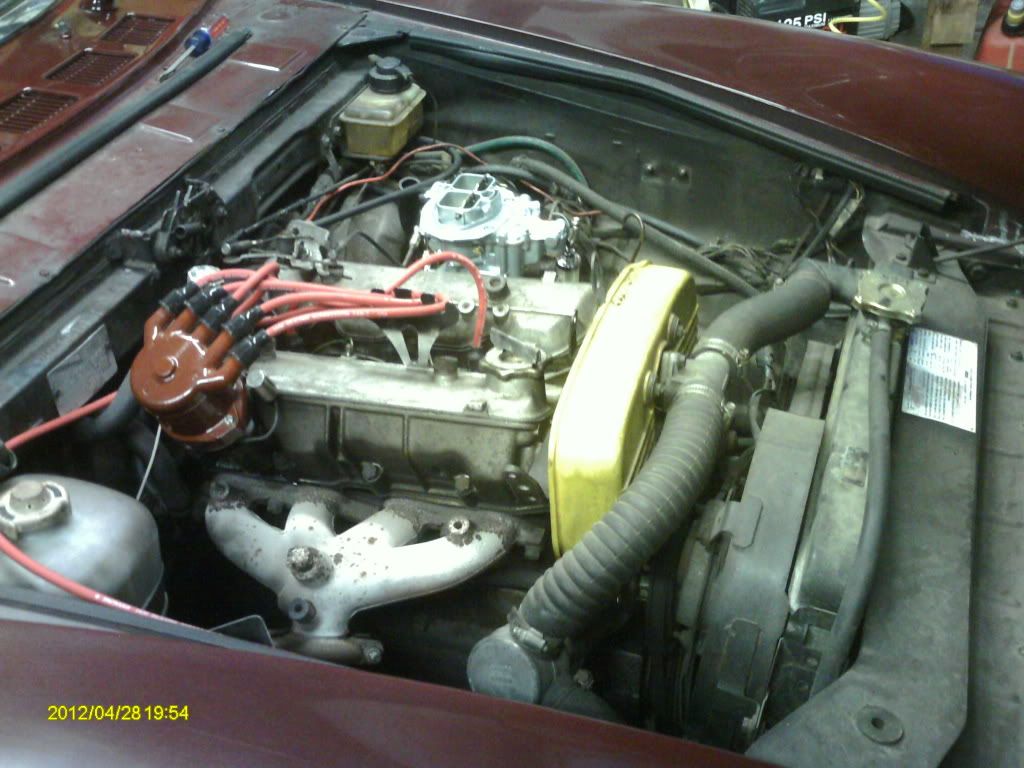
I tried to remove the remnant, soaked w/ PB Blaster, managed to get a wrench on it & tried a couple hammer whacks but no go.
I will be putting on a 4-2-1 header off a 74 I picked up a while ago so no biggie for me.
If I were you I would start soaking w/ PB Blaster every couple days, tap lightly on the fitting itself w/ hammer a bit & then when you get to putting a wrench on it make sure you have a real good bite & try a couple medium whacks at the wrench or pulls with a cheater bar, not only to loosen but also the other way to break it loose, back & forth a little at a time.
I had the bung in my Courier exhaust that would not come out, did all this a couple times & got it to loosen just a smidge, then tighten just a smidge, soak again, repeat till it starts working back & forth a little more each time
The exhaust stuff not only rusts/corrodes in the treads it also gets a build up of carbon on the inner threads that need to be broken loose for it to come out.
There are a lot of penetrating fluids out there, WD40 etc.... but I swear by PB Blaster for rust & corrosion, heck it even cleans rust off tools & parts with a soak & a little work.
I also just saw a commercial with Chip Foose about a new WD formula just for rust, haven't tried it though.
Re: 1978 rolling restoration
Posted: Mon Apr 30, 2012 1:21 am
by DocGraphics
So today more progress, before I put in fresh gas to go for the test run (tank on empty from seafoam treatment) I pulled the tank & got the rear bumperettes installed.
I did a quick sand & satin black paint job on them to look more like rubber.
They went in great, you don't pull the rubber grommets & have to push them in firmly to get the stock bolts in.
The tube mount set-up for the stock bolts works sweet, mount SOLID, 10 minute install once the tank was out again.
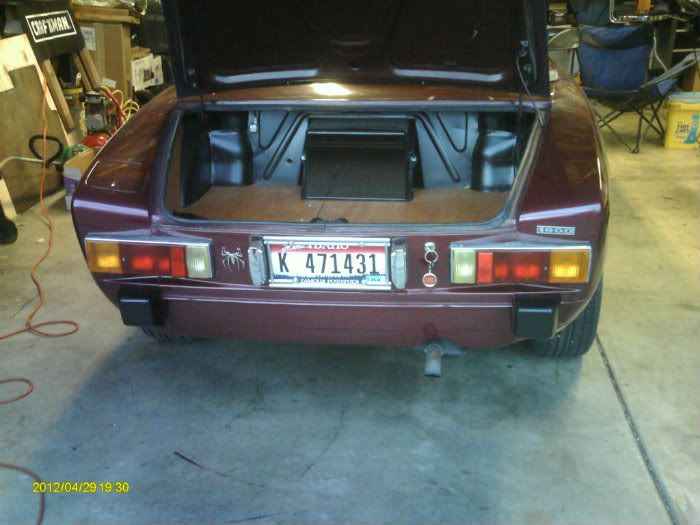
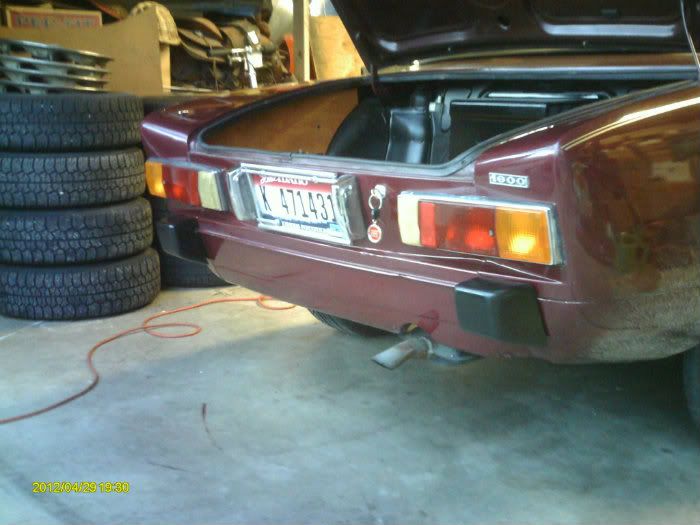
Put the tank back in & filled with fresh hi-test & ran her at idle till fan came on.
Not much missing while warming up but still has a little at temp at idle, still having ign issues.
While I was doing the removal of all the emission stuff I noticed that the dist does not turn that 1/4" & snap back, makes me think the advance isnt working in it.
One more reason to get the elect ign pieces installed soon, currently just timed by ear.
Anyhow, the test drive was great, runs so smooth down the road, pulls good all the way thru redline, especially above 4000 rpm.
I can feel the difference from the old ADFA, can't wait to get the ignition switched over & 4-2-1 exhaust on too.
I can say this DFEV seems a little quieter (carb sound) on acceleration & there is no burble...burble...pop..pop on deceleration.
Love it! Can ya see my grin? I think it even makes the exhaust note better.
Great weekend, I am finally getting things moving on the upgrades for this spring.
Progress feels good but lots more to do!
More to come.
Re: 1978 rolling restoration
Posted: Sat May 19, 2012 5:51 pm
by DocGraphics
Playing out in the garage today & got my front spoiler installed...looks sweet
A little sanding to prep, a couple coats of primers to fill any imperfections & 2 coats of satin black
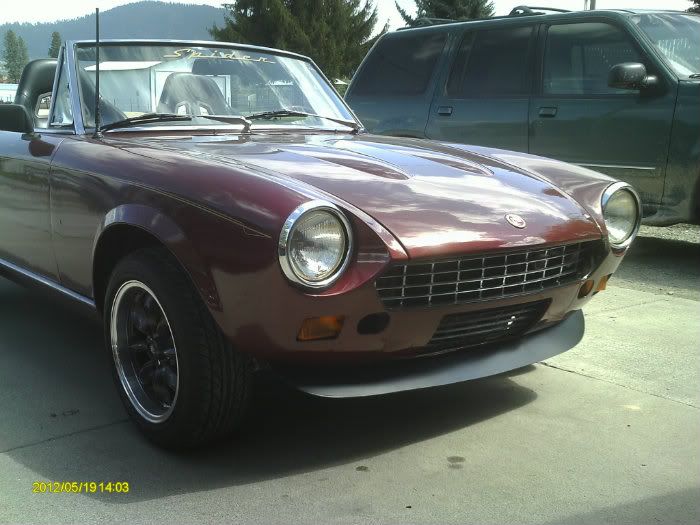
I have so many things yet to install/upgrade yet can't seem to make the time...to busy driving her for her to be down for long.
Re: 1978 rolling restoration
Posted: Sat May 19, 2012 6:28 pm
by jimmycakes401
Awesome. I don't have the money to spare to buy goodies, but could probably scrounge up the time. I can't decide which is worse. LOL!
Re: 1978 rolling restoration
Posted: Wed May 30, 2012 7:02 pm
by DocGraphics
OK...dove in HARD, started ALL the engine repairs & upgrades. I am missing good driving weather but want to get all this done before the summer really starts
Doing new timing belt & all front seals, new pan gasket, all new hoses, putting on the 4-2-1 header & an electronic ignition.
All of this is the fun stuff but the not so fun is all the cleaning, man she's filthy, all but exhaust seal leaking badly.
I'll get her all cleaned up & paint the valve covers & pulleys & such gold w/ black for the brackets, should look good in the burgundy car.
I am planning on running w/o the timing cover & I have mis-matched cam gears, so looking for a matching gear has slowed me down a bit. At the moment looking for exhaust side slotted gear but if that doesn't work I start looking for a solid intake one.
Radiator out, cover off
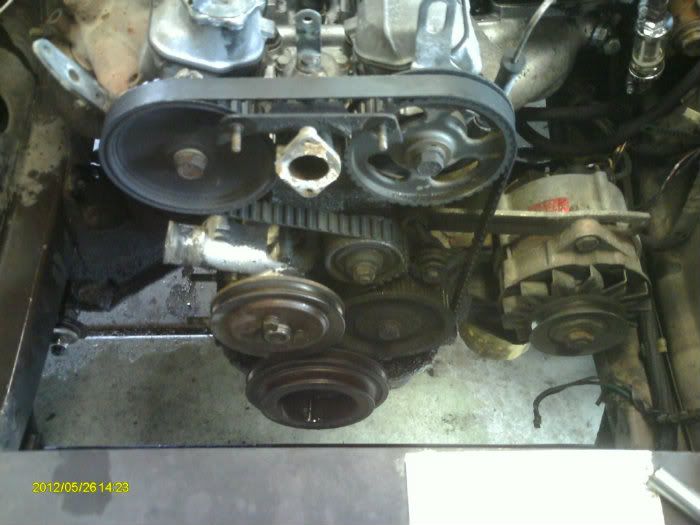
Timing belt & gears off, man it's dirty, been leaking for a long while
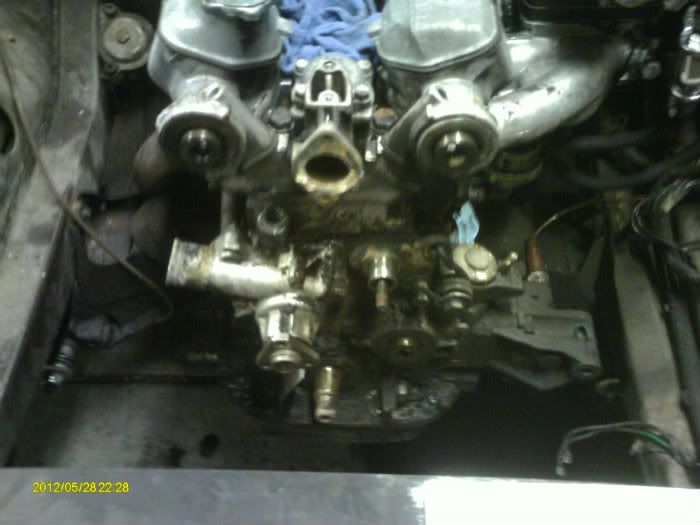
Taking my time & doing it right, mostly apart ready to clean....having fun though!
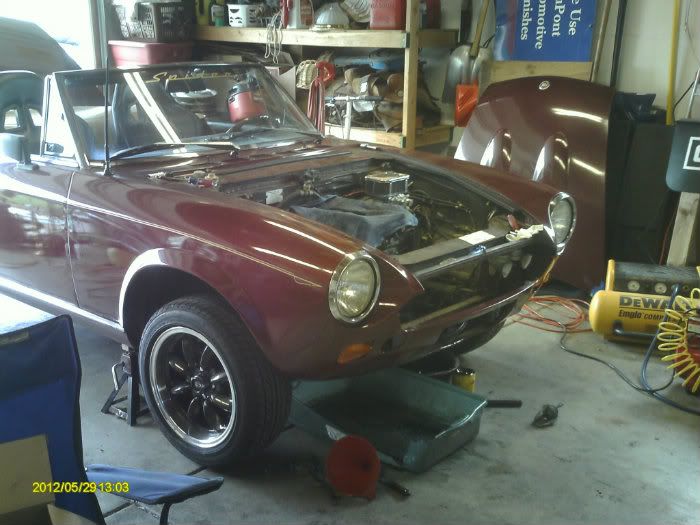
I'll keep the updates coming on this adventure as they happen....more to come!


