Finally. Wanted a Spider..more details!

General chat about the car goes in here.
Post Reply
wizard124
Posts: 752
Joined: Mon Oct 29, 2012 9:27 pm
Your car is a: 1980 124 spider FI
Location: Sheridan, WY exSan Rafael, CA

Re: Finally. Wanted a Spider..more details!

Post by wizard124 »

John..thanks for your inputs.

I'll have the car up on stands later today to pull the drive shaft. A productive, N Ca, rainy day activity. I may pull that brake regulator while I'm under there. I just need to check part availability before I do.

In addition to my parts stash that came with the car, I have some Fiat manuals that are proving useful. I'll be able to trace the turn signal issue but just haven't dug into it yet. When I push the hazard switch, it just goes in and out. There may be nothing connected to it....my first place to look.

To be continued.... :arrow:

Warren
rlux4
Patron 2022
Patron 2022
Posts: 4211
Joined: Thu Jan 10, 2008 8:32 pm
Your car is a: 1982 2000 Spider
Location: Granite Falls, Wa

Re: Finally. Wanted a Spider..more details!

Post by rlux4 »

It's common for these emer. switches to fail like that, and turn signals will only work if it's pushed in. A temporary fix is a toothpick or something to hold it in until you rebuild/replace it. The connector is most likely still plugged into the back.
Ron
Ron Luxmore
rlux2n2@gmail.com
'82 2000 Spider: after 26 years between Spiders.
User avatar
4uall
Posts: 4145
Joined: Mon Sep 26, 2011 12:09 pm
Your car is a: 1980 Fiat Pininfarina Spider 2000 F.I.
Location: Ottawa, Ontario, Canada

Re: Finally. Wanted a Spider..more details!

Post by 4uall »

Jay

Fiona
1980 FI 2000 Spider
ITZEBTZE

https://goo.gl/photos/eNKaX7hrXhBu9fmp6

FINN (FN-2187)
2014 Jeep Wrangler Sport
MYTHERPY
wizard124
Posts: 752
Joined: Mon Oct 29, 2012 9:27 pm
Your car is a: 1980 124 spider FI
Location: Sheridan, WY exSan Rafael, CA

Re: Finally. Wanted a Spider..more details!

Post by wizard124 »

Well, I undertook the job of dropping the drive shaft this afternoon. Really not too difficult aside from the cramped working conditions with the car resting on floor stands... :roll:
I am glad I bought a new floor creeper. This made the many trips back and forth under the car for tasks such as looking for the right tool, re-setting the parking brakes, etc. much, much easier.

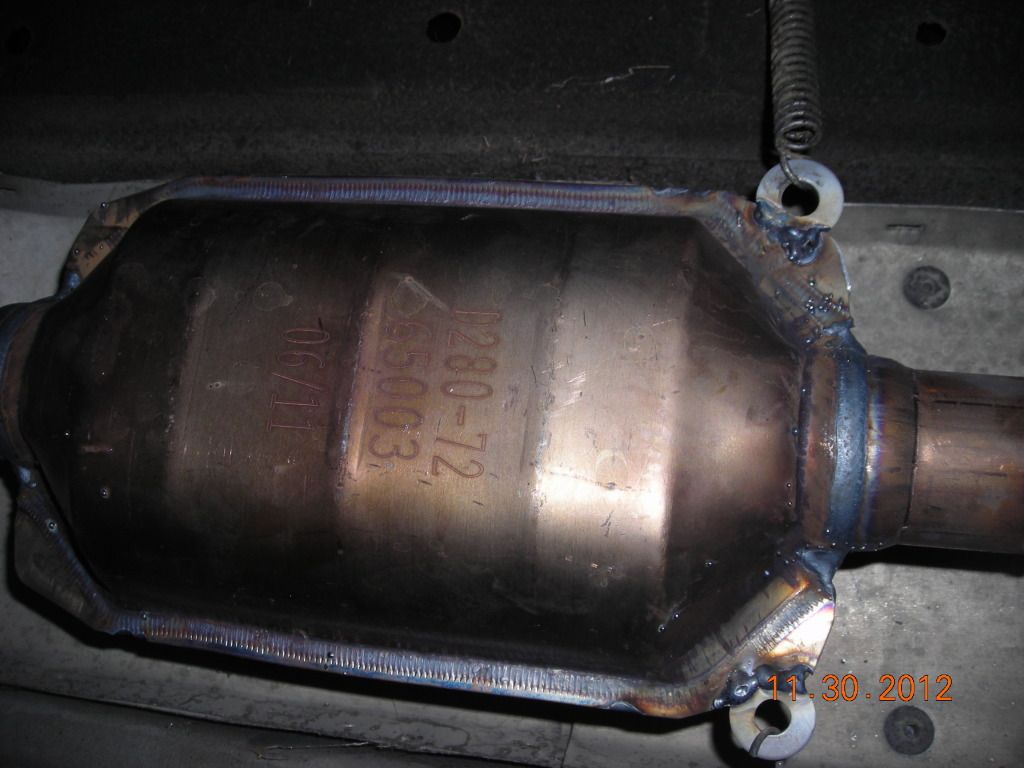
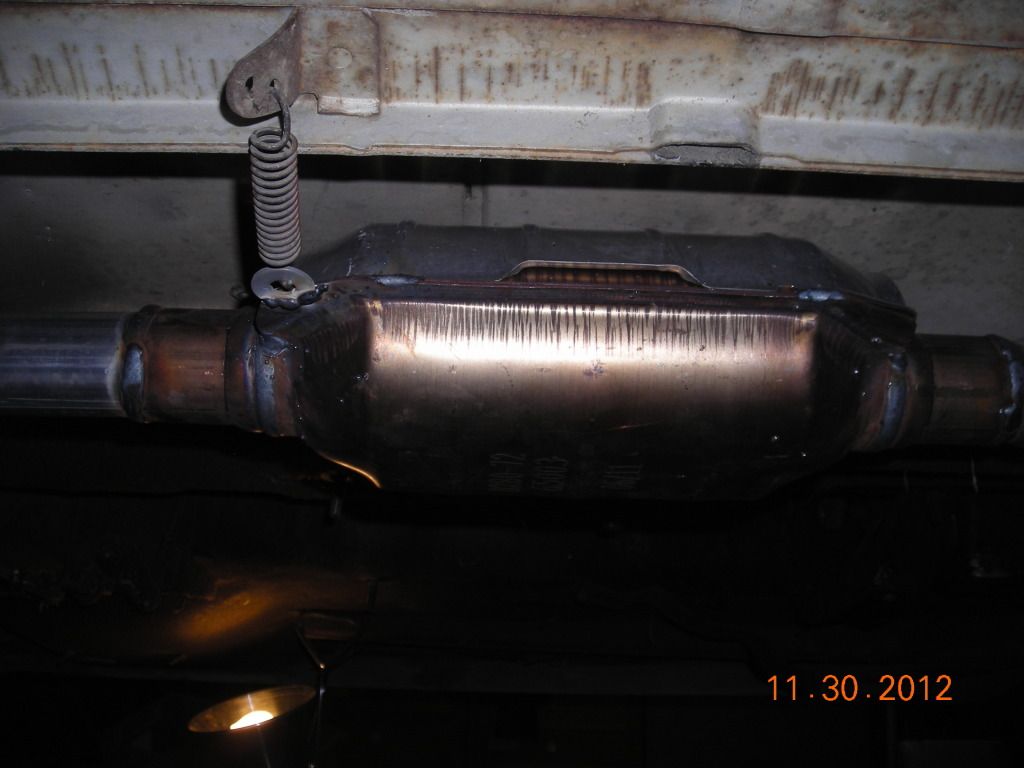
Some pictures of the catalytic converter install. I still don't know the manufacturer:
Image
Image

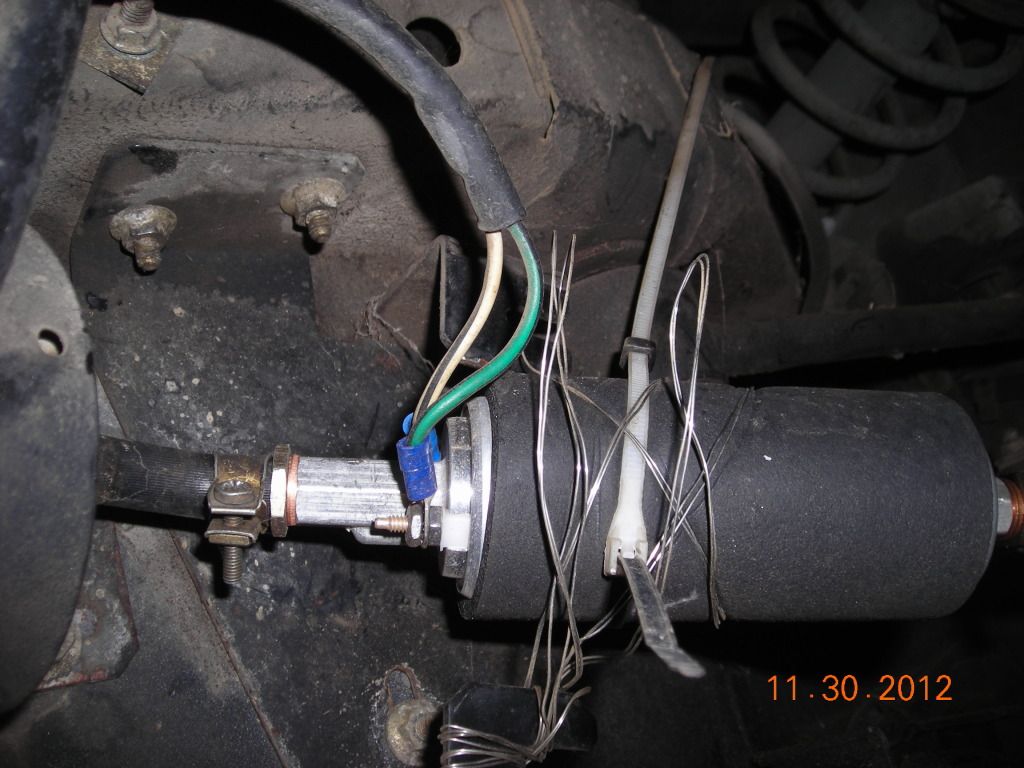
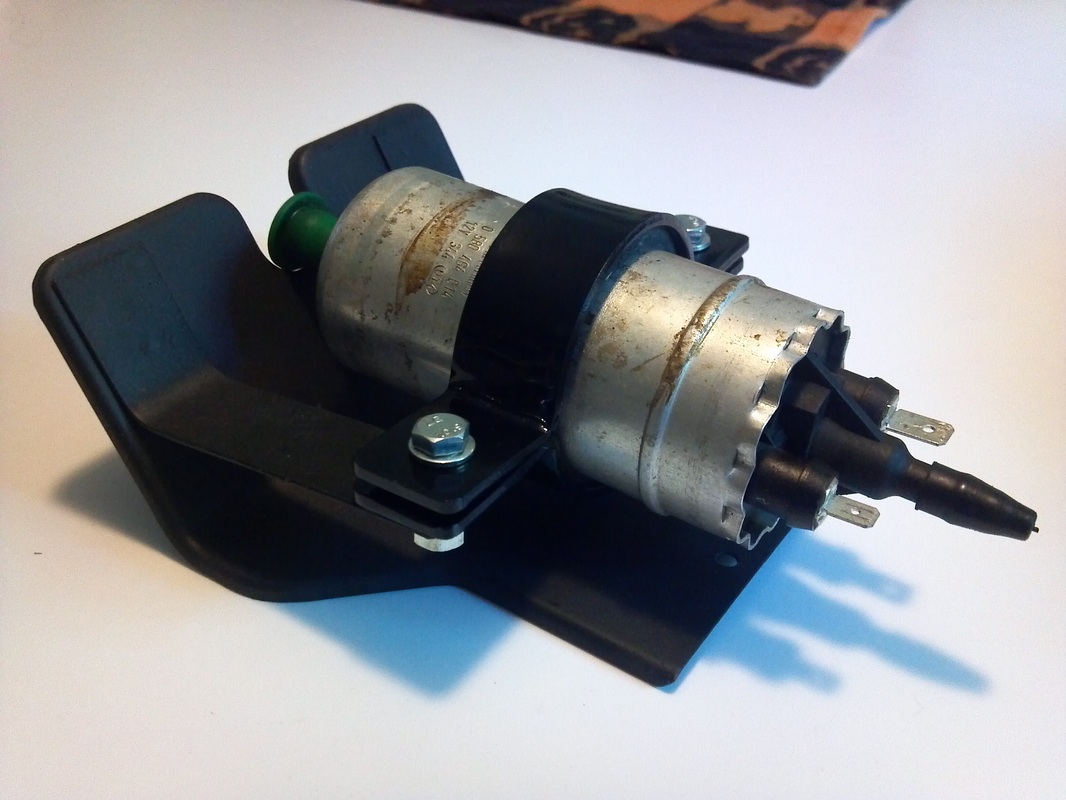
Check this mess out from the PO. Can someone input a photo of what this fuel pump installation is supposed to look like? I may have that missing bracket :?:
Image

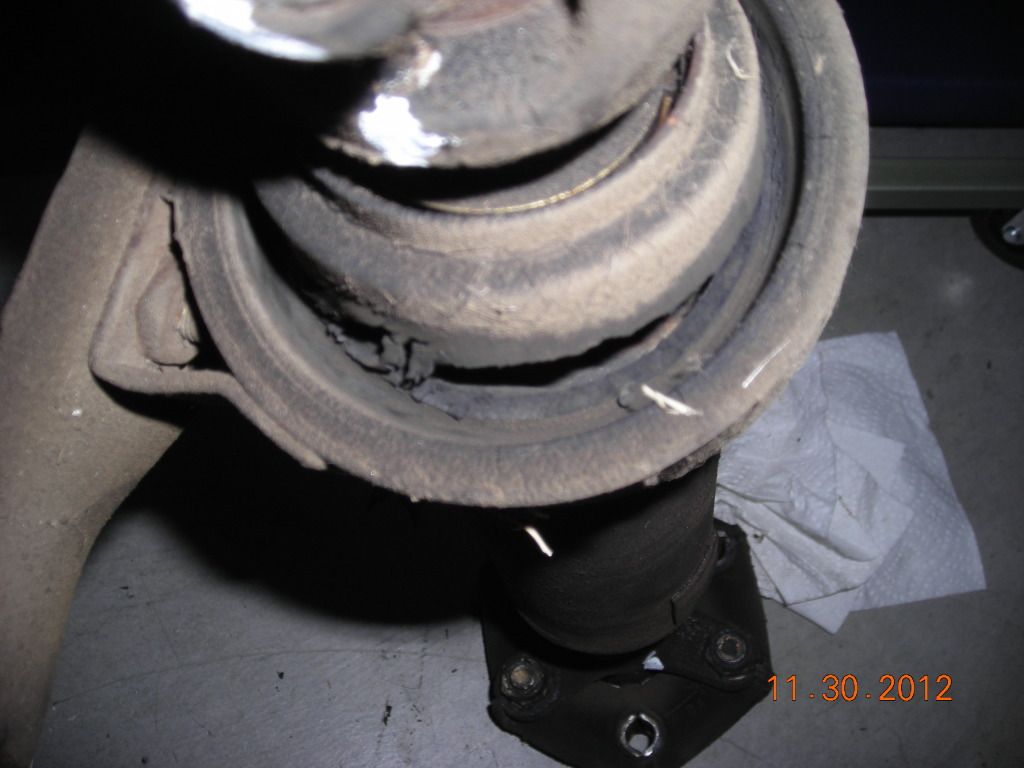
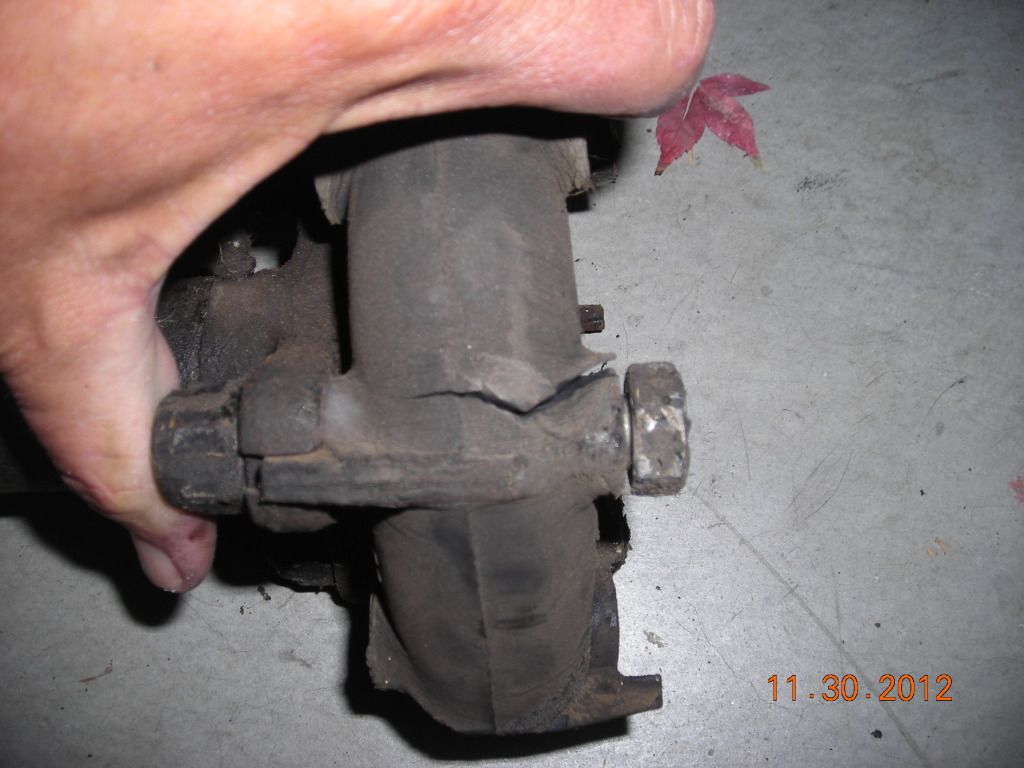
My drive shaft has some issues. Worse than I expected...
Image
Image

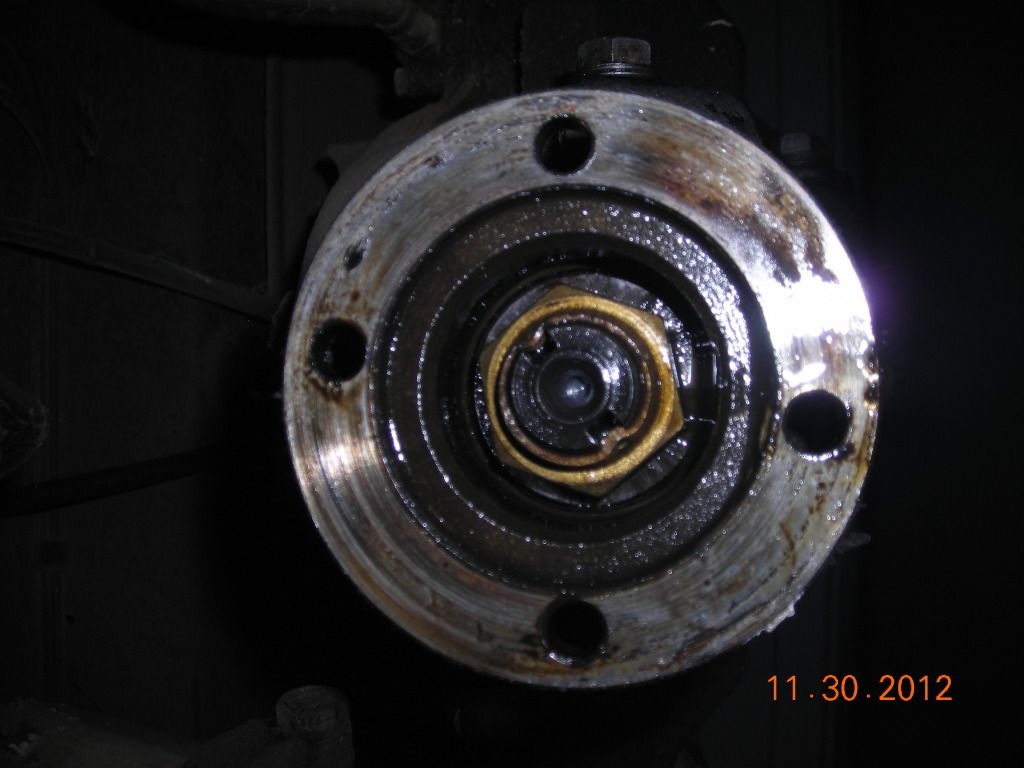
A bit of a leak from the differential pinion seal. How tough is it to replace the seal? I think I would have to drop the rear wheels on the floor to be able to torque that nut loose and then not have the room to get under there to do it. :evil: I think I may just live with the minor leak for now.
Image

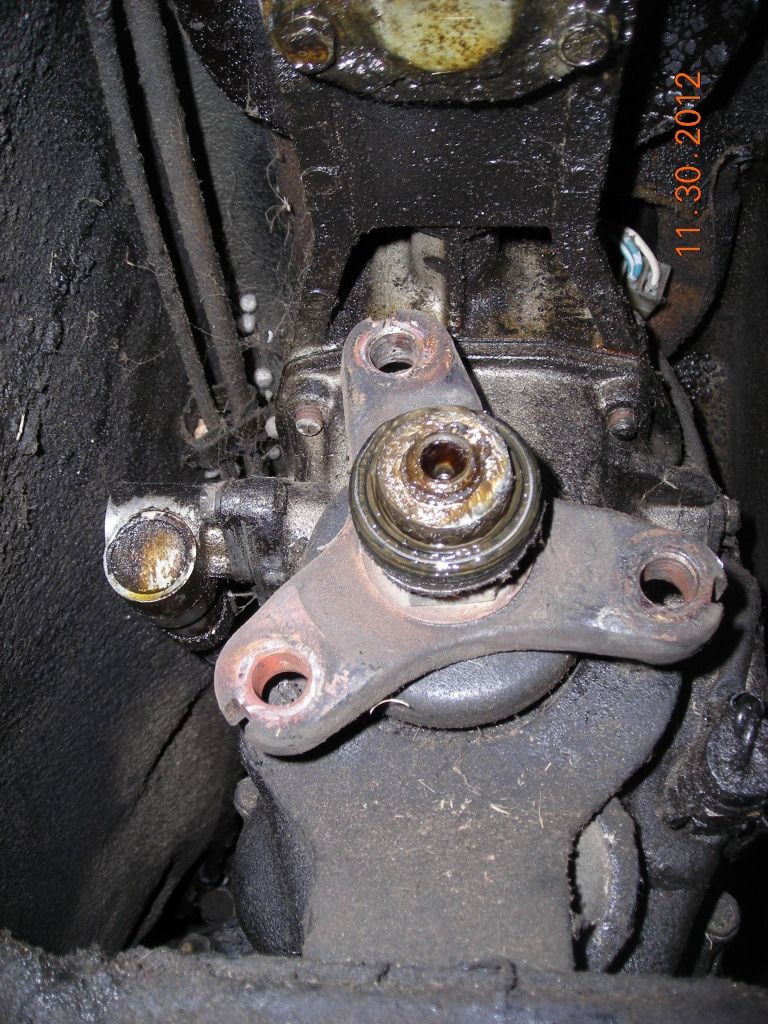
Some oil around the tranny output. This may be drips from the shifter plate. I was able to tighten those 3 bolts down.
Image
Gotta love the spider eggs!They told me this car sat for a long, long time.

What else should I fix or look for while I have the car up on stands and the drive shaft out :?: The brake regulator is leaking. I wasn't able to see how that bolts on. Do you have to pull the right rear wheel to gain access? Help needed :!:

Warren
wikkid

Re: Finally. Wanted a Spider..more details!

Post by wikkid »

Spider Eggs! Your car is a female, then.
User avatar
spidernut
Posts: 1906
Joined: Wed Jan 25, 2006 12:20 am
Your car is a: 1979 Fiat Spider Automatic
Location: Lincoln, CA

Re: Finally. Wanted a Spider..more details!

Post by spidernut »

Image

http://fiatspider.weebly.com/uploads/3/ ... ig.jpg?492

It mounts a little differently that the bailing wire and zip ties pictured on your car.
John G.
1979 Spider (Owned since 2000)
1971 124 Sport Spider (Owned since 2017)
1977 Spider (Sold 2017)
1979 Spider (Disposed of in 2017)
1979 Spider (Sold 2015)
1980 Spider (Sold in 2013)
1981 Spider (Sold in 1985)
2017 Spider (Owned since 2019)
User avatar
4uall
Posts: 4145
Joined: Mon Sep 26, 2011 12:09 pm
Your car is a: 1980 Fiat Pininfarina Spider 2000 F.I.
Location: Ottawa, Ontario, Canada

Re: Finally. Wanted a Spider..more details!

Post by 4uall »

what are you talking about....................zip ties are standard on all Fiats :shock:

Image

As far as torquing, perhaps a garage with a lift can do it for a few bucks. I threw a guy $20 and he let me get under it for about an hour (huge liability for both of us) shhhhhhh :shock:
Jay

Fiona
1980 FI 2000 Spider
ITZEBTZE

https://goo.gl/photos/eNKaX7hrXhBu9fmp6

FINN (FN-2187)
2014 Jeep Wrangler Sport
MYTHERPY
FiatDavidFiat

Re: Finally. Wanted a Spider..more details!

Post by FiatDavidFiat »

wikkid wrote:Spider Eggs! Your car is a female, then.
LOL!.. priceless!

That flex-joint was bAd, the mount is bad.. you can get the whole mount/bearing/retainer ring - unit for $45 before shipping.. I just had mine replaced.. the u-joints and flex-joint are $20 a piece, about to do mine also.. The leak on the differential pumpkin, I think you said, is heavy.. Not difficult, the thing is just a pain to line up and bolt on simultaneously.. better to have a friend to hold it in place if possible..

Procedure: Remove the wheels, remove half moon rotor shield (only the half blocking the caliper - 4 small bolts), unbolt calipers (2 large bolts), remove rotor bolts (the 2 protrusions that stick out when tire is removed), remove rotor, remove retainer ring (hiding sneakily behing the axel - end), yank axels free (one on either side - nothing holding it in after that.. I had to use a pry bar on one of mine).

You can then pull the 8 bolts from around the pumpkin and it'll come right out (drain it first!); reseal (I used RTX? Red - silicon seal [not sure if it's solid yet, but it seems okay]).

Also, make sure you change your timing belt ($11)! It's a simple procedure, and it can either stretch to cause bad timing while driving or simply snap and destroy your engine! Oh, and did you replace the condensors (2) and points (2) when you replaced your cap and rotor? Wouldn't hurt to put in a new ignition coil if you have $20 to burn while you're at it..
wizard124
Posts: 752
Joined: Mon Oct 29, 2012 9:27 pm
Your car is a: 1980 124 spider FI
Location: Sheridan, WY exSan Rafael, CA

Re: Finally. Wanted a Spider..more details!

Post by wizard124 »

I tackled the job of tearing apart the drive shaft today. I forgot just how fun u-joints can be :wink: Much easier having the whole thing on a bench instead of replacing an individual u-joint from underneath the car. Older and wiser,,,as they say. :lol:

Only 1 was bad but I am replacing them both. With the 2 sections separated, I removed the retaining nut and hammered that u-joint housing off the spline section of the drive shaft. Soaking it with WD40 and using a long punch and hammer got it to free up.

Next, was the removal of the rubber support and bearing. Since I was not sure how it was supposed to come off, I removed the bearing retaining clip first. But the entire assembly was still frozen to the shaft. I used a razor knife to cut around the center of the rubber support, leaving only the bearing and bearing carrier on the shaft (with a little of the rubber). I was able to use a steering wheel puller to pull the bearing and carrier loose from the shaft. So, I'll order the parts required. Hopefully. I'll have this back together without any surprises in a week or so. :)

I did some searches on replacing the pinion seal. I am leaning towards leaving this alone for now. I hate leaks, this one doesn't seem to be bad. I have enough other items that are a higher priority (brake compensator, turn signals, wipers, heater and fan, etc) that I think I will tackle this one in a later round of the match. :roll:

As to the brake compensator replacement. I could use some advice and instruction. I am not familiar with how that rod connects. I plan to disconnect and cap off those 2 brakes lines tomorrow and remove the entire assembly to have a better look at it. Will I need to bleed the brakes at the compensator on re-fit, or can I just do it at the rear brakes (which I suspect need it anyway) :?:

Spidernut, thanks for that picture of the fuel pump. I'll have a look to see if those brackets may be loose in my trunk.
wizard124
Posts: 752
Joined: Mon Oct 29, 2012 9:27 pm
Your car is a: 1980 124 spider FI
Location: Sheridan, WY exSan Rafael, CA

Re: Finally. Wanted a Spider..more details!

Post by wizard124 »

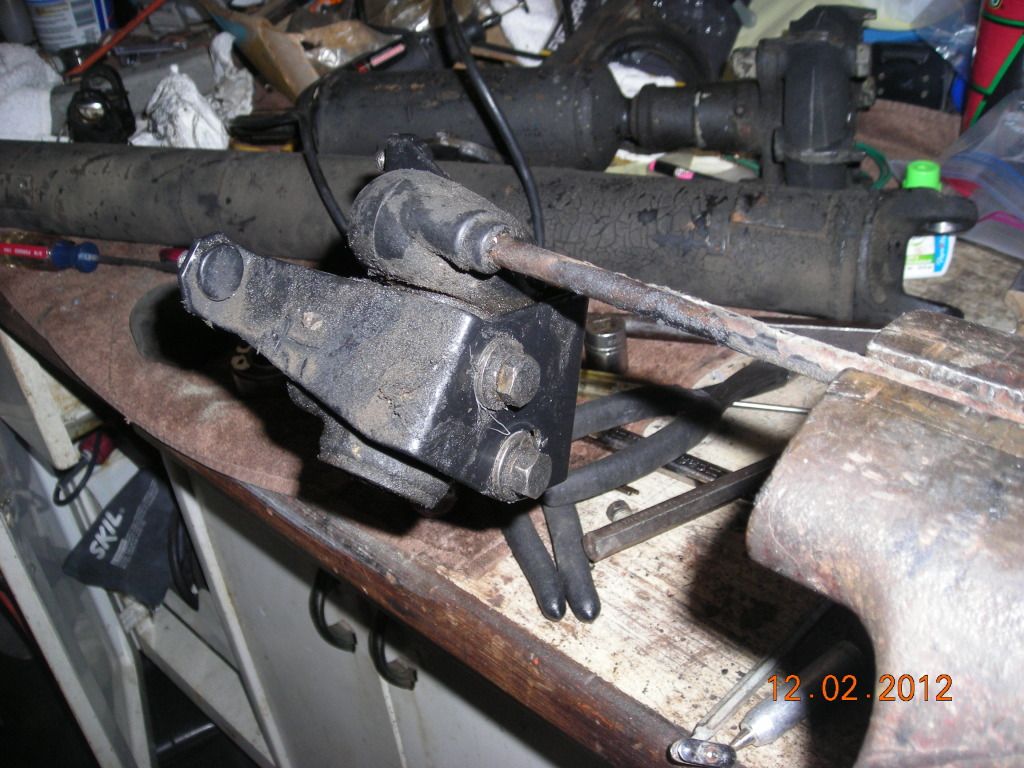
I removed that leaking brake compensator and linkage.

Most aggravating part was loosening the 2 flare fittings. I even bought a flare nut wrench set from Napa to avoid stripping the nuts. One broke free, the other stripped. :evil: Nothing a pair of vice grips couldn't take care of! :) I tried to use a heat gun on the compensator but that SOB died during the attempt (Wagner). :twisted:

For those who want to tackle this, here is what I did:

1) Remove the right rear tire to gain access;
2) Pull loose the rubber axle bumper;
3) Removed the bolt which holds the very end of the linkage;
4) Remove the 2 bolts which hold the linkage sleeve to the body;
5) Loosen the 3 nuts which hold the compensator bracket to the frame, access from the wheel well,
6) Break loose the flare fittings,
7) Undo the rear muffler rubber mounting straps where they attach to the muffler,

Now, unscrew the flare fittings with the the 3 bracket nuts removed. You will need a lot of paper towels and a bucket to catch the brake fluid. Once the flare fittings are off, maneuver the entire assembly to drop behind the axle. You will probably have to pull on the loose muffler to gain the room needed to get that bracket to clear.

With the compensator on the workbench the rest is very straight forward. I etched the location of the adjustment bolts which hold the compensator to the bracket....I assumed that this setting was probably correct when the car was new. :?: So, I will mount the new one in the same place.

Picture added:
Image
wizard124
Posts: 752
Joined: Mon Oct 29, 2012 9:27 pm
Your car is a: 1980 124 spider FI
Location: Sheridan, WY exSan Rafael, CA

Re: Finally. Wanted a Spider..more details!

Post by wizard124 »

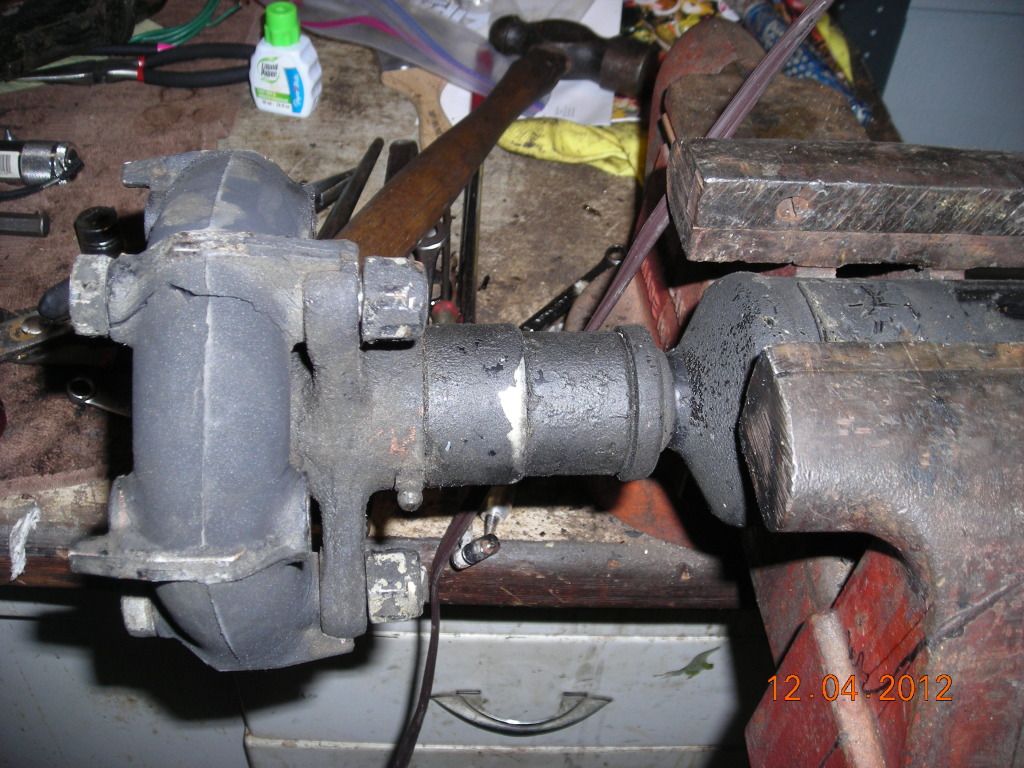
I decided to clean and re-paint the drive shaft. There was some old under seal that was cracked and not evenly distributed around the shaft. This must not have been very good for the drive line balance....so I took on the job.

I left the rubber seal on the shaft so not to crack it while trying to remove it over the slines. Then, the yoke slipped off easily.
Image

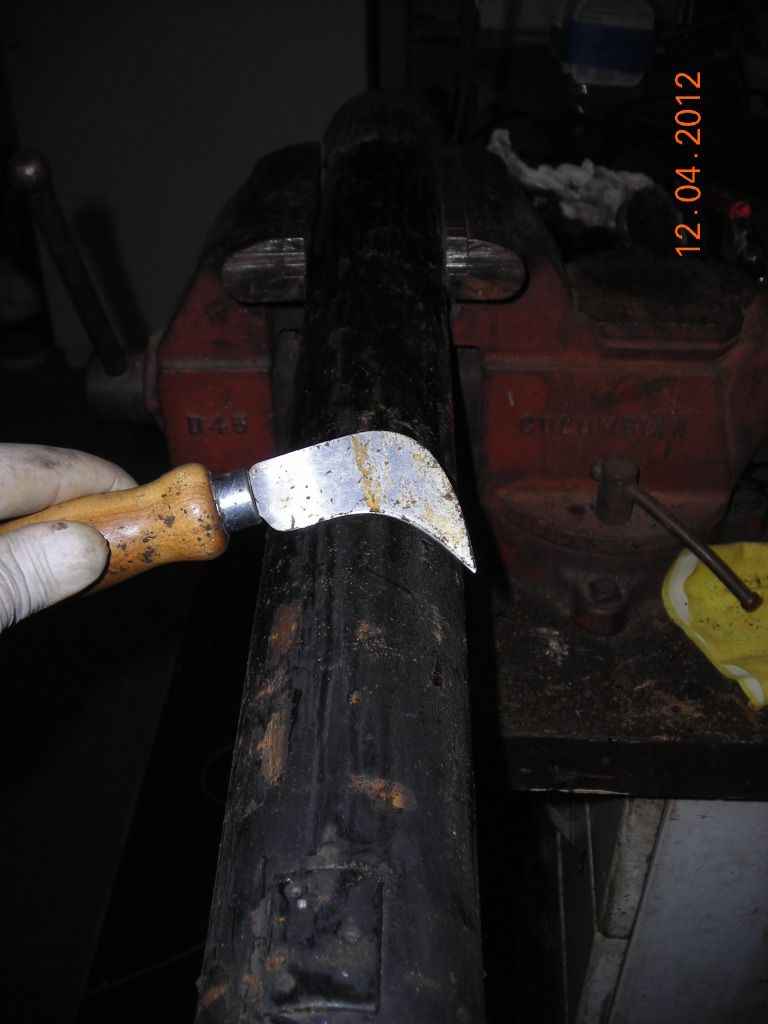
A carpet knife makes an excellent scraper:
Image

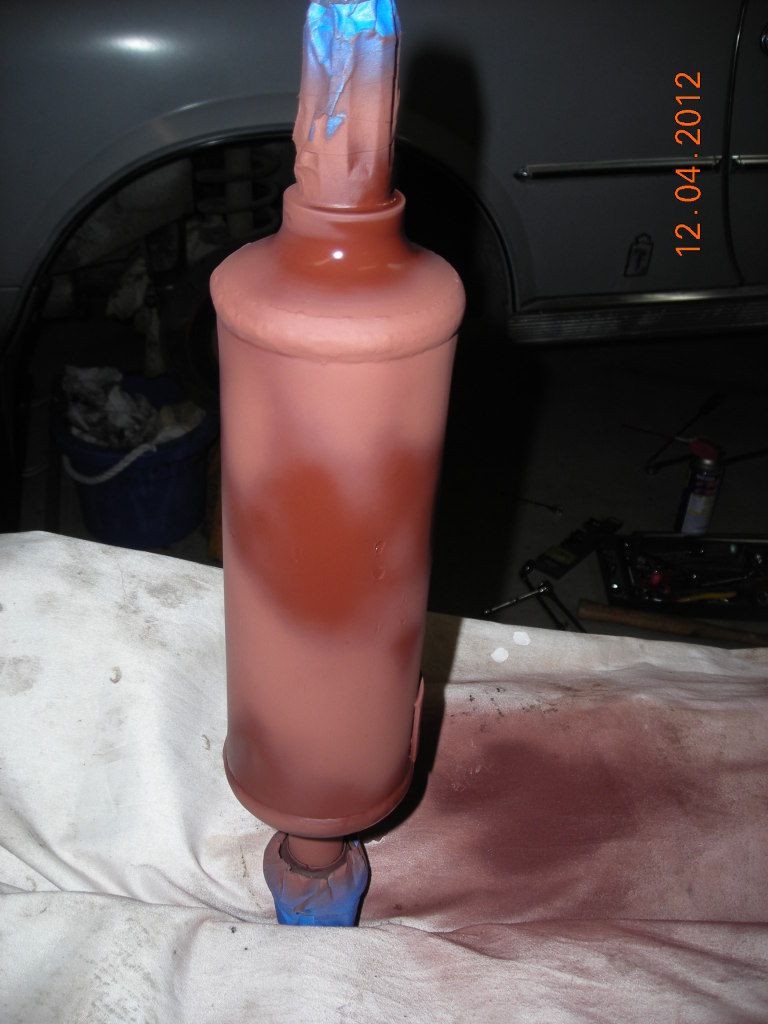
I spent quite a while sanding, wheel brushing, and wiping down the forward shaft. Then primed:
Image

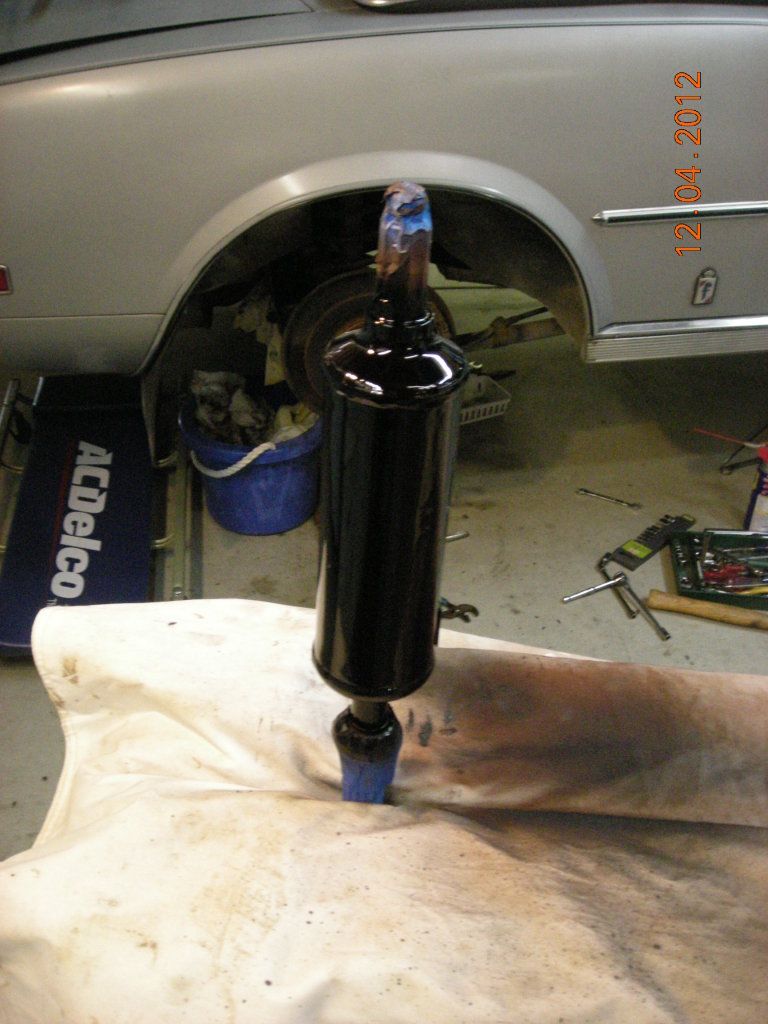
And painted. I used Rustoleum primer and enamel.
Image

More pieces to do... :arrow:
wizard124
Posts: 752
Joined: Mon Oct 29, 2012 9:27 pm
Your car is a: 1980 124 spider FI
Location: Sheridan, WY exSan Rafael, CA

Re: Finally. Wanted a Spider..more details!

Post by wizard124 »

With my drive shaft parts and brake compensator on order, I looked around for other tasks to accomplish.

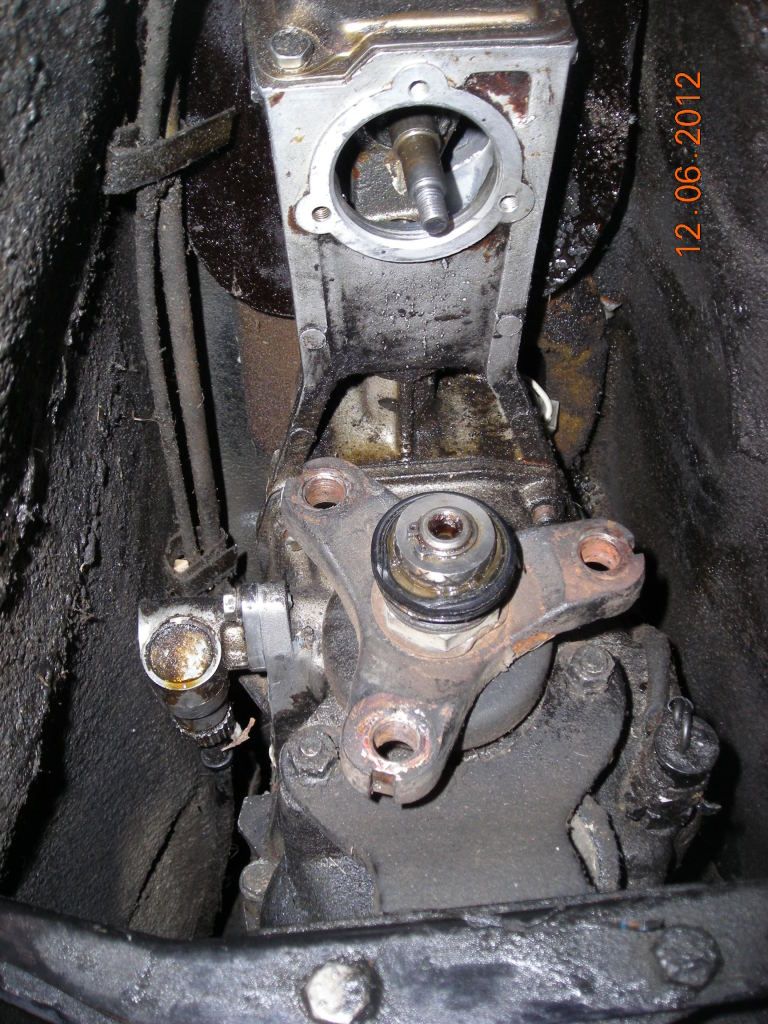
I loosened the retaining bolt to the speedometer gear and slid it out as far as the transmission tunnel would allow. This allowed me enough room to apply sealant to both sides of the gasket. It was getting way too involved to drop the rear of the tranny far enough where it would slide out entirely and I could change the gasket also. I think sealant alone will work. :|
Image

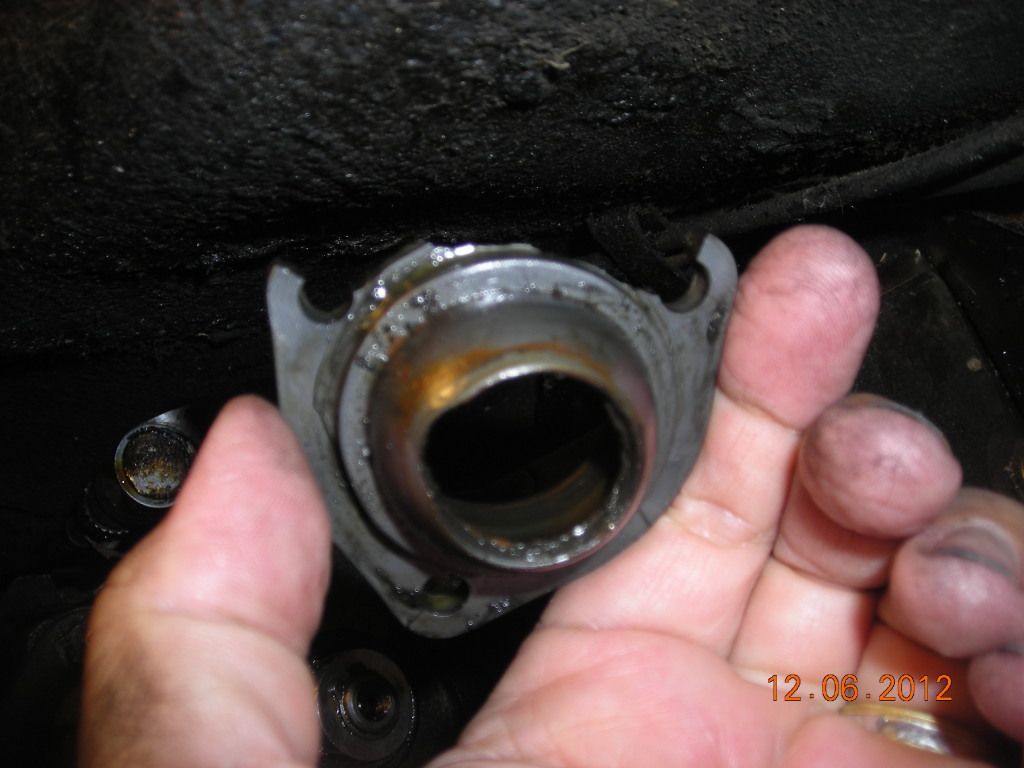
I also noticed something cracked where the 3 bolts hold a plate to the underside of the shifter (this had been wet with fluid earlier). You will notice this plate with its innards removed in the above photo. Turns out the shifter socket was broken :evil: Fortunately, I had a spare to replace the broken one. :D
Image

I had to wait for my son to get home from school before I could get it back together. He needed to hold the gear shift down while I pushed up to compressed the spring and align the other pieces and put a socket on the nut at the base of the shifter. Fun, working on your back, fighting gravity, and needing 4 hands to get the job done. :roll: Applied sealant to both sides of the socket. I hope not to re-visit this leak any time soon.
redcars
Patron 2020
Patron 2020
Posts: 487
Joined: Sat Jul 31, 2010 9:36 pm
Your car is a: 1981 Spider 2000
Location: Collinsville, IL

Re: Finally. Wanted a Spider..more details!

Post by redcars »

There is not suppost to be oil in there. It is leaking in from the tany by way of the shifter shaft. The shifter housing has a seal that is to keep oil out of the shifter. It doesn't really cause a problem other than it is hard to keep it from leaking out from below the shifter.
1987 Lotus Super 7 clone
1981 Fiat Spider 2000 AT
1982 Fiat Spider 2000 5sd
1970 Fiat Coupe
wizard124
Posts: 752
Joined: Mon Oct 29, 2012 9:27 pm
Your car is a: 1980 124 spider FI
Location: Sheridan, WY exSan Rafael, CA

Re: Finally. Wanted a Spider..more details!

Post by wizard124 »

redcars wrote:There is not suppost to be oil in there. It is leaking in from the tany by way of the shifter shaft. The shifter housing has a seal that is to keep oil out of the shifter. It doesn't really cause a problem other than it is hard to keep it from leaking out from below the shifter.
I may have been wrong about oil under that plate. Its a greasy mess under there. I do recall thinking the speedometer gear was leaking.

When I removed the plate, no transmission fluid leaked out. :shock: There was some old grease and residue on the pieces and on the bottom of the plate. Well, its been re-greased and is sealed up now. :lol:
wizard124
Posts: 752
Joined: Mon Oct 29, 2012 9:27 pm
Your car is a: 1980 124 spider FI
Location: Sheridan, WY exSan Rafael, CA

Re: Finally. Wanted a Spider..more details!

Post by wizard124 »

Well,,,,, my wife comes out to the garage while I am tinkering today and asks when she will get her car back in the garage :lol: :lol: :lol: :lol: :lol: :lol: :lol: :lol: :lol: :lol: :lol: :lol:

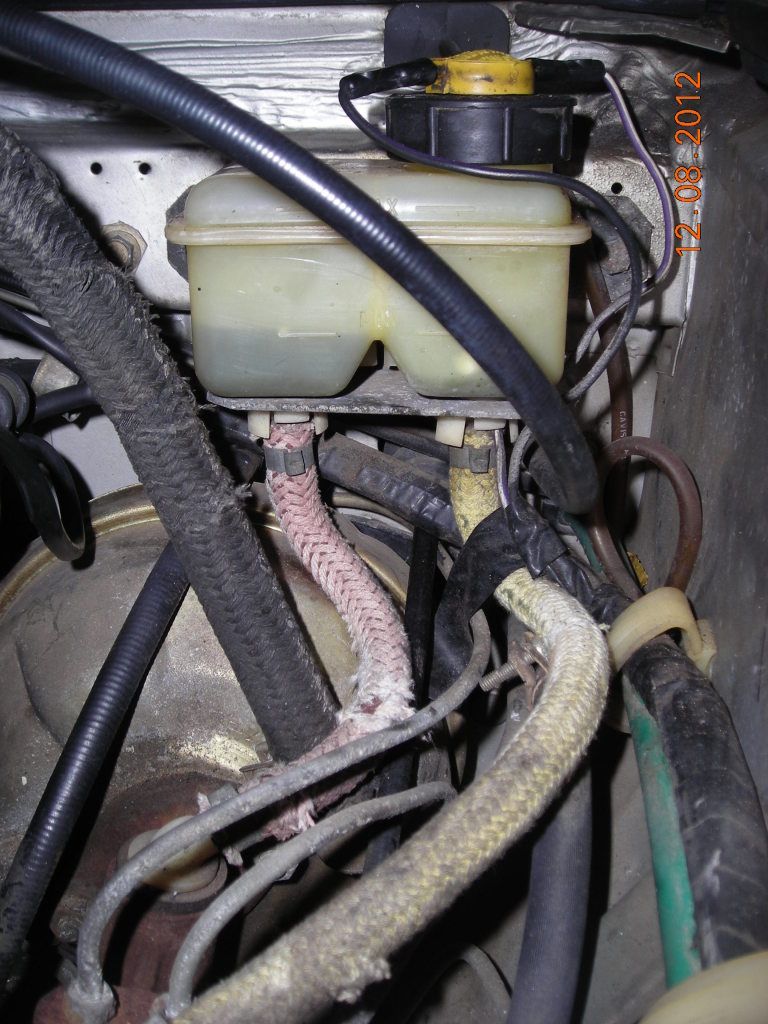
My brake reservoir went from this:
Image

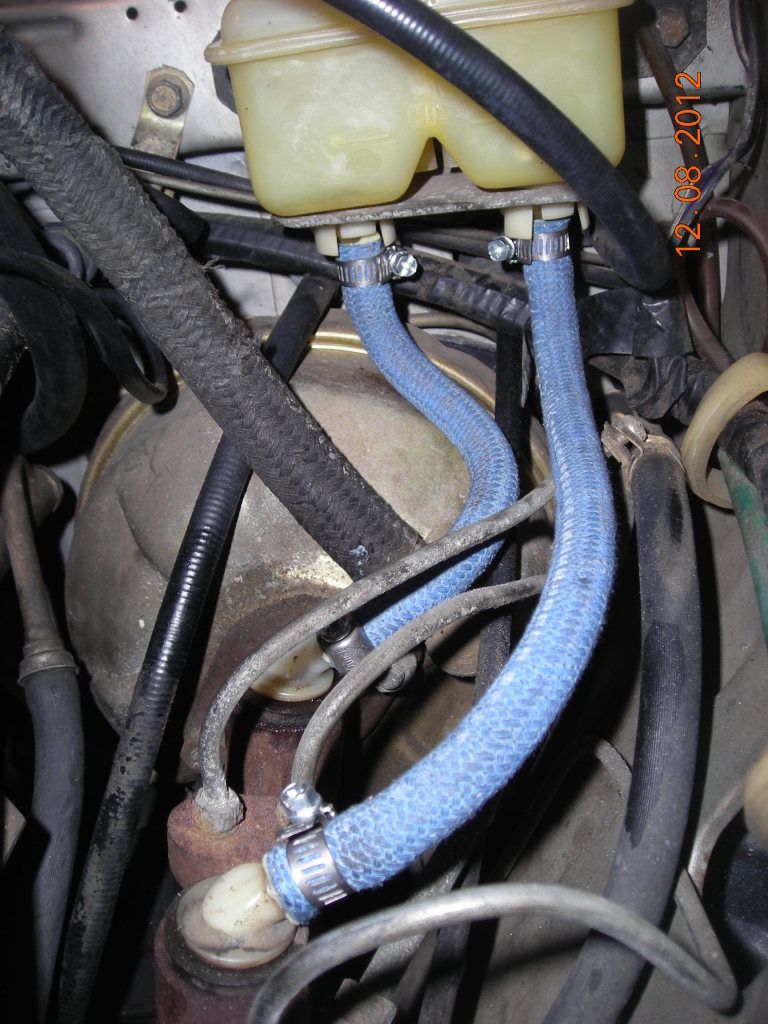
To this :D
Image

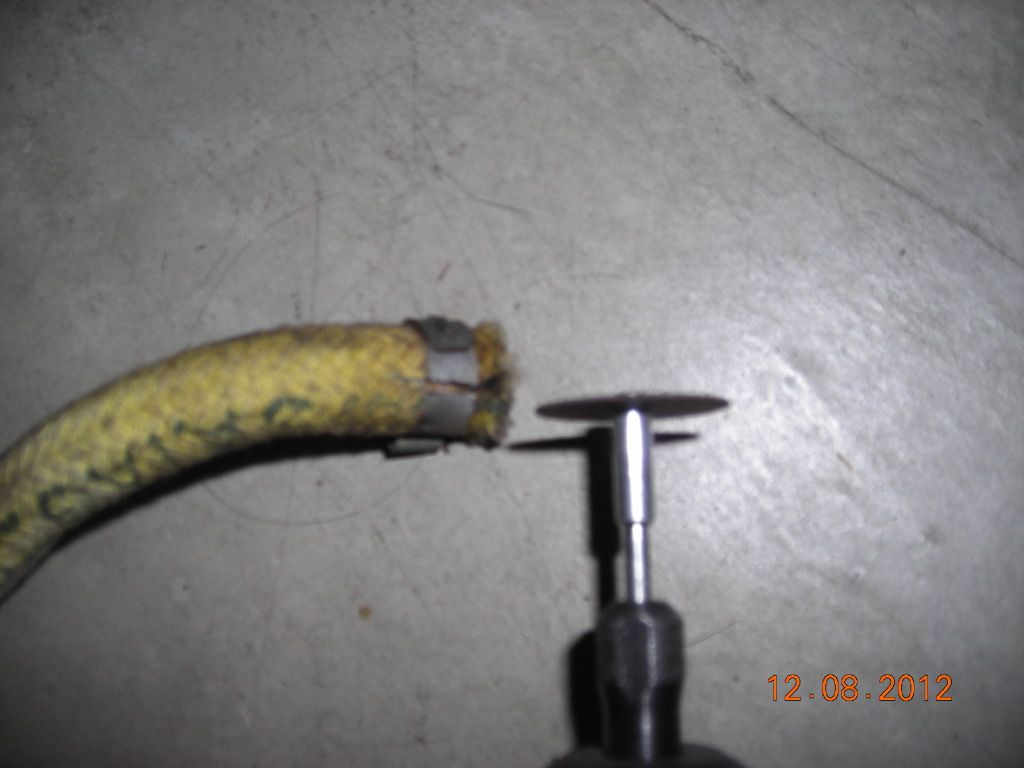
I used a Dremel cut off blade to cut through the original clamp; letting the hoses slide off easily (certainly didn't want to break those plastic flare fittings on the master cylinder and reservoir:
Image

I cut the clamps at the MC first, then removed the reservoir. I had a lot of sediment at the base of the reservoir. I swirled some gas around in it which cleaned it out. The replacement hose I got at Napa. It looked like it had been sitting around a long time. Made in Germany so it should be a metric size but may be a mm smaller than the original. Anyway it works! :D
Post Reply