Making a cupholder/arm rest
-
- Patron 2022
- Posts: 4211
- Joined: Thu Jan 10, 2008 8:32 pm
- Your car is a: 1982 2000 Spider
- Location: Granite Falls, Wa
Making a cupholder/arm rest
As requested, I have put together a picture log of the making of the cup holder/arm rest. I'm including notes on it's construction if anyone wants to use it as a guide. Hope you like it.
1. Select the wood. I use Poplar for two reasons. It can be found with varying grains, so you can find a grain you like, and it is a "semi-hard" soft wood. Not as soft as Pine, but soft enough to work easily. 1X6 is perfect for a fit between the seats. Cut 3/8" off the width of the intermediate spacers so they don't overhang the rounded edges of the top and bottom pieces when it's assembled. I also cut the same 3/8" width off the leg piece to avoid two edges lining up.
2. Cut out the pieces. I've made this one a little longer than the 1st one I made as a test run. The pieces measure: Top and bottom; 12-1/2". Intermediate spacers; 2-1/4". Rear leg; 3-3/8". The intermediate spacer length give the finished unit a comfortable height for anyone of near average height.
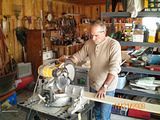
3. Cut corner radiuses on top and bottom pieces (I used a teflon tape holder for the pattern, the size of the radius is a matter of taste.) I made a carboard pattern to get the radius of the tunnel for the leg. Leave about 3/8" of the sides of the leg piece past the cut out for the radius so you don't end up with a sharp point there after you round the sides.
4. Cut out cup holes. I cut a 3-1/4" hole with a hole saw. Center the holes, side to side and come in 3/4" from the front and back edges. This works well for the large drinks and there are foam rubber inserts at the auto parts stores that will fit in it to hold and insulate a drink can
5.Shape the edges. I use a 3/8" rounding bit with the bearing head. Don't round the bottom edge of the top and bottom pieces, or the leg radius section. Round both sides of the intermediate spacers and the leg piece. It works best with a router mounted to a router table.
6. Round the cup hole edge.
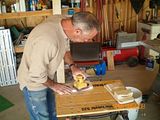
7.Sand the pieces smooth. For most of this I use a belt/disc sander to clean up the corners. Then a palm sander for the majority. Some hand sanding is necessary around the cup holes.
8. Stain the pieces. I stain it now so that I get a good even coat, even though there will be some resanding and staining during assembly where the filler is in the nail holes.
9. Assembly. I use carpenters wood glue and 15 gauge finish nails. First nail the leg to the underside of the bottom piece. After the top is on, you wouldn't be able to nail it. I nail it in 1/2 to 1" from the back edge. It could be closer, but the unit would have to be moved back each time the E-brake was pulled up. Fill these nail holes. Sand it out and restain. Then nail in the intermediate spacers. Place them slightly to the inside the cup holes, centered and squared on the top and bottom pieces.
You'll need to fill the nail holes, sand and restain here also.
Viola! It's ready for the varnish. The level of gloss is a matter of taste. The original wood looking stuff on our later Spiders has a satin finish. I use polyurethane with a UV inhibitor rating.
I realize not everyone will have the tools I do (I make my living with them) these can be made without some of them of course. On the other hand, I don't have all the tools that Norm from New Yankee Workshop has.
I know, I'm not wearing safety glasses. I've found that it's easier to wash the saw dust out of my eyes than to try to see through fogged up goggles. Just as much gets under glasses and in my eyes anyway, so I keep a bottle of eye wash wherever I am working.
If anyone wants to make one of these and needs any help, feel free to Email me at: rlux4@dslextreme.com
Ron
1. Select the wood. I use Poplar for two reasons. It can be found with varying grains, so you can find a grain you like, and it is a "semi-hard" soft wood. Not as soft as Pine, but soft enough to work easily. 1X6 is perfect for a fit between the seats. Cut 3/8" off the width of the intermediate spacers so they don't overhang the rounded edges of the top and bottom pieces when it's assembled. I also cut the same 3/8" width off the leg piece to avoid two edges lining up.
2. Cut out the pieces. I've made this one a little longer than the 1st one I made as a test run. The pieces measure: Top and bottom; 12-1/2". Intermediate spacers; 2-1/4". Rear leg; 3-3/8". The intermediate spacer length give the finished unit a comfortable height for anyone of near average height.
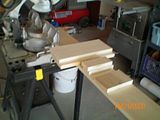
3. Cut corner radiuses on top and bottom pieces (I used a teflon tape holder for the pattern, the size of the radius is a matter of taste.) I made a carboard pattern to get the radius of the tunnel for the leg. Leave about 3/8" of the sides of the leg piece past the cut out for the radius so you don't end up with a sharp point there after you round the sides.
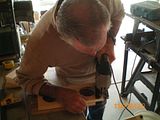
4. Cut out cup holes. I cut a 3-1/4" hole with a hole saw. Center the holes, side to side and come in 3/4" from the front and back edges. This works well for the large drinks and there are foam rubber inserts at the auto parts stores that will fit in it to hold and insulate a drink can
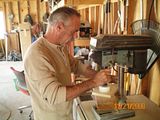
5.Shape the edges. I use a 3/8" rounding bit with the bearing head. Don't round the bottom edge of the top and bottom pieces, or the leg radius section. Round both sides of the intermediate spacers and the leg piece. It works best with a router mounted to a router table.
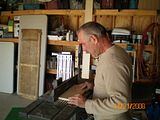
6. Round the cup hole edge.
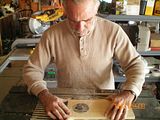
7.Sand the pieces smooth. For most of this I use a belt/disc sander to clean up the corners. Then a palm sander for the majority. Some hand sanding is necessary around the cup holes.
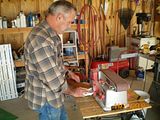
8. Stain the pieces. I stain it now so that I get a good even coat, even though there will be some resanding and staining during assembly where the filler is in the nail holes.
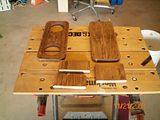
9. Assembly. I use carpenters wood glue and 15 gauge finish nails. First nail the leg to the underside of the bottom piece. After the top is on, you wouldn't be able to nail it. I nail it in 1/2 to 1" from the back edge. It could be closer, but the unit would have to be moved back each time the E-brake was pulled up. Fill these nail holes. Sand it out and restain. Then nail in the intermediate spacers. Place them slightly to the inside the cup holes, centered and squared on the top and bottom pieces.
You'll need to fill the nail holes, sand and restain here also.
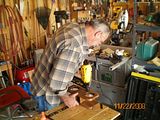
Viola! It's ready for the varnish. The level of gloss is a matter of taste. The original wood looking stuff on our later Spiders has a satin finish. I use polyurethane with a UV inhibitor rating.
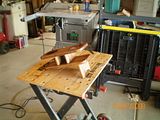
I realize not everyone will have the tools I do (I make my living with them) these can be made without some of them of course. On the other hand, I don't have all the tools that Norm from New Yankee Workshop has.
I know, I'm not wearing safety glasses. I've found that it's easier to wash the saw dust out of my eyes than to try to see through fogged up goggles. Just as much gets under glasses and in my eyes anyway, so I keep a bottle of eye wash wherever I am working.
If anyone wants to make one of these and needs any help, feel free to Email me at: rlux4@dslextreme.com
Ron
Last edited by rlux4 on Wed Mar 11, 2009 8:49 am, edited 6 times in total.
- ga.spyder
- Posts: 3478
- Joined: Tue Nov 06, 2007 7:19 pm
- Your car is a: 1982 Spider 2000
- Location: Blairsville ,Ga.
Re: Making a cupholder/arm rest
Thanks for sharing,Ron. That is an excellent tutorial and a really nice finished product.Is that the one for MikeB? If so, you should laminate a a pic of a Bambi under the varnish. Mike is a lover of the deer!
Craig
Craig
Craig Nelson
1982 Spider 2000...pride and joy
1981 Fiat X1/9..gone but not forgotten
1976 124 Spider..the self-healer
2001 BMW 328ci daily driver and track car
Fling It Around Turns !
1982 Spider 2000...pride and joy
1981 Fiat X1/9..gone but not forgotten
1976 124 Spider..the self-healer
2001 BMW 328ci daily driver and track car
Fling It Around Turns !
-
- Patron 2022
- Posts: 4211
- Joined: Thu Jan 10, 2008 8:32 pm
- Your car is a: 1982 2000 Spider
- Location: Granite Falls, Wa
Re: Making a cupholder/arm rest
Damn Craig! Too late, the first coat is already on. Yes, it's Mike's unit.
Thanks for the comment buddy.
Ron
Thanks for the comment buddy.
Ron
- Tappy
- Posts: 721
- Joined: Wed Apr 02, 2008 8:22 pm
- Your car is a: 124 spider 2000 1979
- Location: Belgium ; Centre Of Europe
Re: Making a cupholder/arm rest
i'm very impressed ! what a nice tutoral , even my wife's asking if she can hire your skills to renovate the whole house , and............ my car
FineItalianAutomobile Technology
pls don't see what i write , read what i mean
-
- Patron 2022
- Posts: 4211
- Joined: Thu Jan 10, 2008 8:32 pm
- Your car is a: 1982 2000 Spider
- Location: Granite Falls, Wa
Re: Making a cupholder/arm rest
Hey Tappy, that's what I do! (The house part, anyway) I like your new wife already. When I come to Belgium, I'll be sure to bring some tools.
Ron
Ron
Re: Making a cupholder/arm rest
We might have to hold on to these pictures, might be the first time we have seen Ron working, and not sitting in a chair with a beer while someone else is doing the tooling.
All kidding aside, that looks great. Job well done. This might make me retire the batting helmet with the two beers on the side and the long straw.
-
- Patron 2022
- Posts: 4211
- Joined: Thu Jan 10, 2008 8:32 pm
- Your car is a: 1982 2000 Spider
- Location: Granite Falls, Wa
Re: Making a cupholder/arm rest
Busted by Pope.
I do actually work though, with tools and everything! The plan was to be retired by now, but I am on retirement plan C.
Plan A: Work for a corporation for 35 years and get a pension.
Plan B: Win the lottery.
Plan C: Die on the job.
Ron
I do actually work though, with tools and everything! The plan was to be retired by now, but I am on retirement plan C.
Plan A: Work for a corporation for 35 years and get a pension.
Plan B: Win the lottery.
Plan C: Die on the job.
Ron
Re: Making a cupholder/arm rest
Thanks Ron! Looks like we have the same Router tables. Wish I could work on cars and wood, but Id need a new garage like yours. It tells alot when you can see a fellas garage and workshop. Plan C looks like the likely option! Thanks!
Re: Making a cupholder/arm rest
i just gotta peak at the arm rest that Ron has built for my Christmas present to my wife... and all i can say is
WOW
Ron, you do good work
WOW
Ron, you do good work
-
- Patron 2022
- Posts: 4211
- Joined: Thu Jan 10, 2008 8:32 pm
- Your car is a: 1982 2000 Spider
- Location: Granite Falls, Wa
Re: Making a cupholder/arm rest
Thanks Mike. It's somewhere between you and me right now. (Went out yesterday.)
Ron
Ron
Re: Making a cupholder/arm rest
well, i will do my best to attempt a step-by-step record of the process to add a removable padded vinyl cover for the assembly. No promises...
Re: Making a cupholder/arm rest
o.k. well the long awaited "how to create a removable padding for the Lux Cup Holder" is now available at:
http://webpages.charter.net/mbouse/padd ... 20step.pdf
if nothing else, it is worth the read for entertainment...unless you are a cat lover
http://webpages.charter.net/mbouse/padd ... 20step.pdf
if nothing else, it is worth the read for entertainment...unless you are a cat lover
Re: Making a cupholder/arm rest
Lookin good, hope Missy likes it! PS, give her a big New Years hug from us!
Re: Making a cupholder/arm rest
Missy loves it, and i will forward your New Years greeting to her shortly.