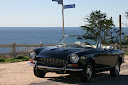
Ok - so after being out of town for week I was able to work on the car today.
After contacting Vick's, they sent me a long stud needed for the installation, a screw for the one missing in the rotor and instructions for wiring.
Here it is installed.

The long stud interfered with the wiring harness of the dizzy, so I only had about 15 degrees of total timing flexibility because of the stud and other clearances. In the pic below, you can see I don't have much room due to the proximity of the manifold.

If the stud had been about 1.5 inches shorter, I would have had a lot more timing movement. Anyway, I basically had to time the car by removing the dizzy cap, and physically lifting the dizzy shaft our of the gear pit, and turning the rotor, and then reinstalling. After the third try, I had the timing very close, and then the 10-15 degrees of movement was plenty. (I have it timed about 10 degree BTDC).
During the installation, it dawned on my that I would have to run both run 12VDC to the coil (I wish the instructions were clearer on this), and I would have to rewire my tachometer if I wanted it to work. I decided (at least for the time being) to simply run extension wires from the original coil hook up on the passenger side, above the fire wall, and to the new coil on the driver side. The idea was to make this very easy to "reverse the installation" if I decide to go back to a traditional setup. Not the prettiest thing, but it is completely reversible and fully functional.
Also note, I have not removed the old dizzy yet - but all the electronics are disconnected. I also have the old coil still in place at this stage.
Of note, my spark plug wires (except plug 1) really had a hard time reaching the plugs from the new dizzy location. If each wire was about two inches longer, I would have felt a lot better. They all fit, but I don't like the "bends" needed to make everything reach. You can see some off this here:
Also note, I have an 1800, but I have a Weber 32/36 DFEV. As a result, I used the "bent" air filter from the original 1972 engine to fit the shape of this carb. All the wires fit under the air filter, but there is not much space. If I were running a "lunchbox" air cleaner, there would not be any clearance issues. I don't know how the clearance would look with the 1800 air filter on, but my guess is it would be marginally better (it doesn't bend down at the end).
Note that the new dizzy is held down by the clamp that previously held down the "plug". I was able to get things to tighten up respectably, so I am optimistic the mount will hold up well under extended driving conditions. I will have to reuse the plug once I remove the original dizzy. However, it is too long to fit in the cam tower, and the "thin part" (about 1 1/4 inches down) will need to be hacked off with a saw. I will then use the original dizzy clamp to hold the plug and plug the cam tower hole.
Ok, enough already with the installation....so how did it drive???!!??
I have only put on about 20 miles - but so far it feels great. Recall I disconnected the vacuum advance on my original, and even so after running and stopping, the advance would stick and it would rev way to high. Both problems are now solved. The vacuum seems to be working smoothly and seamlessly, and the advance returns every time I slow down. The advance curve seem just about the same as on my original, but everything seems to run smoothly and it just feels "stronger". Could be a better spark for the new coil, or it could be just everything is new. So far even with the "bends" in the plug wires, they all seem to be working perfectly.
Verdict: So far I am feeling good about this. I plan on putting a few hundred miles on this setup (making sure everything is solid and there are no oil leaks) before removing and plugging the original cam driven dizzy. I will post after putting some more miles on it.