Tried that, and the bushing would bend but not ooze in, at least using the vise/socket method. Using a press would be different. I'd try it the way you're thinking; I agree with the logic.
Still thinking about the press vs one more try.
Neil
Rear Trailing Arm Bushings....with pix.
-
njoconnor
- Posts: 614
- Joined: Thu Jul 05, 2012 7:06 pm
- Your car is a: 1972 124 Spider
Re: Rear Trailing Arm Bushings....with pix.
Neil O'Connor
Madison, WI
72 FIAT 124 Spider
12 Jeep Grand Cherokee Overland Summit
14 Ram 1500 Laramie Longhorn Eco-Diesel
ex-71 FIAT 124 Coupe
and a host of Audi's, Saabs, VW's, MOPAR's, Fords, and a Bimmer....
Madison, WI
72 FIAT 124 Spider
12 Jeep Grand Cherokee Overland Summit
14 Ram 1500 Laramie Longhorn Eco-Diesel
ex-71 FIAT 124 Coupe
and a host of Audi's, Saabs, VW's, MOPAR's, Fords, and a Bimmer....
-
njoconnor
- Posts: 614
- Joined: Thu Jul 05, 2012 7:06 pm
- Your car is a: 1972 124 Spider
Re: Rear Trailing Arm Bushings....with pix.
Ok, as my favorite philosopher used to say: "This time fer shure.....Presto!"
(Wrong hat).
So after my prior attempt at re-installing the rubber bushings into the rear trailing arms/panhard rod (and installing the wrong bushings in the panhard... ), I read some of the replies to 70spider's dilemma, and started thinking. What if....I got the metal sleeve 1/2 way into the bushing, then pressed the bushing into the arm, then pressed the sleeve home using the various sockets and the bench vise? Csaba's comment about WD-40 also stuck. Hmmmmm.....
First, it helps to have a spouse who doesn't mind celebrating Father's Day a couple months early:
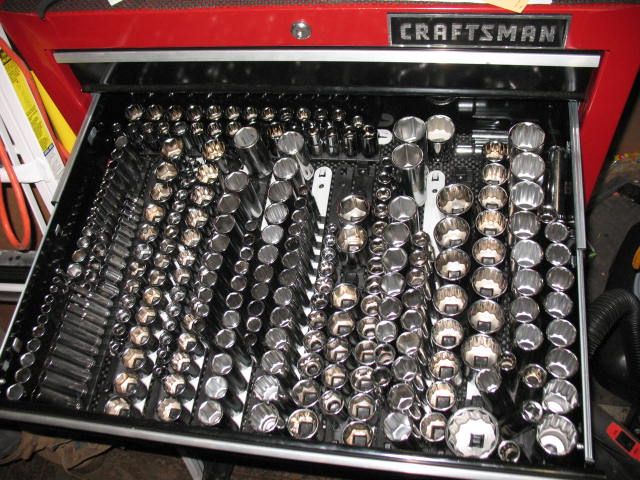
With 300 sockets, I gotta have the right one.
Second, I wire brushed (with a drill/wire wheel) all of the sleeves so they were as smooth as possible. Third, made a mark 24mm from the end of the sleeve, 1/2 of the 48 mm length (used a silver El Marko... best thing for marking dark stuff!). Bathed sleeve and bushing in WD-40, and lined everything up:
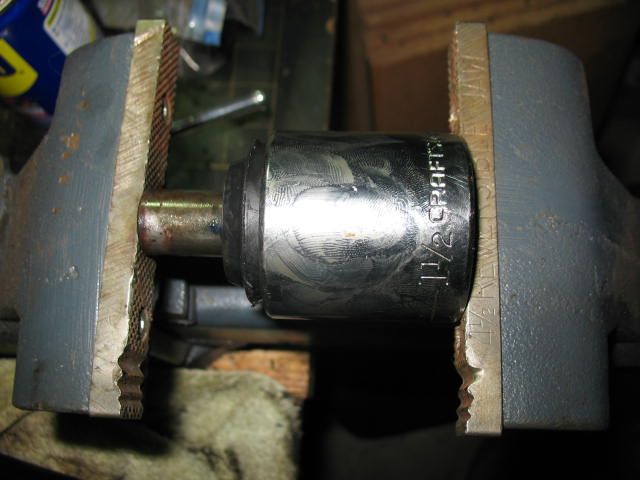
The 1 1/2 inch socket holds the bushing in place while the sleeve oozes in. I stopped pressing at the half way mark.
Next, I used a 32mm socket to cover the sleeve, and press the bushing into the trailing arm, again bathing everything with WD-40, and taking my time....letting it ooze into place (no pix 'cause I was so surprised it was working).
Once the bushing popped into the arm, I pressed the sleeve in flush with a necked down 1/4 inch socket, and held the bushing in place with a 1 1/2 inch socket (fits the step on the outside of the bushing):

And it worked.
Sorry it was too late for 70spider, but if this helps someone else, great! 1 more upper trailing arm and the panhard rod to go (lowers are new from A/R due to corrosion on the inside of the bushing sockets...I could actually flex one of the walls..... )
)
Neil
(Wrong hat).
So after my prior attempt at re-installing the rubber bushings into the rear trailing arms/panhard rod (and installing the wrong bushings in the panhard...
First, it helps to have a spouse who doesn't mind celebrating Father's Day a couple months early:
With 300 sockets, I gotta have the right one.
Second, I wire brushed (with a drill/wire wheel) all of the sleeves so they were as smooth as possible. Third, made a mark 24mm from the end of the sleeve, 1/2 of the 48 mm length (used a silver El Marko... best thing for marking dark stuff!). Bathed sleeve and bushing in WD-40, and lined everything up:
The 1 1/2 inch socket holds the bushing in place while the sleeve oozes in. I stopped pressing at the half way mark.
Next, I used a 32mm socket to cover the sleeve, and press the bushing into the trailing arm, again bathing everything with WD-40, and taking my time....letting it ooze into place (no pix 'cause I was so surprised it was working).
Once the bushing popped into the arm, I pressed the sleeve in flush with a necked down 1/4 inch socket, and held the bushing in place with a 1 1/2 inch socket (fits the step on the outside of the bushing):
And it worked.
Sorry it was too late for 70spider, but if this helps someone else, great! 1 more upper trailing arm and the panhard rod to go (lowers are new from A/R due to corrosion on the inside of the bushing sockets...I could actually flex one of the walls.....
Neil
Neil O'Connor
Madison, WI
72 FIAT 124 Spider
12 Jeep Grand Cherokee Overland Summit
14 Ram 1500 Laramie Longhorn Eco-Diesel
ex-71 FIAT 124 Coupe
and a host of Audi's, Saabs, VW's, MOPAR's, Fords, and a Bimmer....
Madison, WI
72 FIAT 124 Spider
12 Jeep Grand Cherokee Overland Summit
14 Ram 1500 Laramie Longhorn Eco-Diesel
ex-71 FIAT 124 Coupe
and a host of Audi's, Saabs, VW's, MOPAR's, Fords, and a Bimmer....
-
seabeelt

- Patron 2019

- Posts: 1614
- Joined: Tue Feb 19, 2008 4:22 pm
- Your car is a: Fiat Spider - 1971 BS1
- Location: Tiverton, RI
Re: Rear Trailing Arm Bushings....with pix.
Just as good as a HF press 
Michael and Deborah Williamson
1971 Spider -Tropie’ - w screaming IDFs
1971 Spider - Vesper -scrapped
1979 Spider - Seraphina - our son's car now sold
1972 Spider - Tortellini- our son's current
1971 Spider -Tropie’ - w screaming IDFs
1971 Spider - Vesper -scrapped
1979 Spider - Seraphina - our son's car now sold
1972 Spider - Tortellini- our son's current
-
njoconnor
- Posts: 614
- Joined: Thu Jul 05, 2012 7:06 pm
- Your car is a: 1972 124 Spider
Re: Rear Trailing Arm Bushings....with pix.
Well...I dunno. Always something to be said for another tool..... 
Neil
Neil
Neil O'Connor
Madison, WI
72 FIAT 124 Spider
12 Jeep Grand Cherokee Overland Summit
14 Ram 1500 Laramie Longhorn Eco-Diesel
ex-71 FIAT 124 Coupe
and a host of Audi's, Saabs, VW's, MOPAR's, Fords, and a Bimmer....
Madison, WI
72 FIAT 124 Spider
12 Jeep Grand Cherokee Overland Summit
14 Ram 1500 Laramie Longhorn Eco-Diesel
ex-71 FIAT 124 Coupe
and a host of Audi's, Saabs, VW's, MOPAR's, Fords, and a Bimmer....