Allison Automotive Radiator Install...
-
Raze
Allison Automotive Radiator Install...
I ended up getting Mark's radiator kit. I'm in process of installing it on a 72 Spider. There are several simple things I would point out to make life much easier when installing an oversized aftermarket radiator.
Tools needed: dremel and an angle grinder, 13mm socket, drill and bits, touchup paint, flat-head screw driver.
Initial recommendations: Mark's kit comes with spacers, mounting brackets and self-tapping screws which are not coated. After fitment (read modification of the brackets due to spacing/differences between years) you should go ahead and paint these parts with something that'll resist water, oil, solvets, etc (think engine enamel, cheap at your local parts store).
Initial work: After painting the parts above I put the sway bar spacers in place, this dropped it about an inch. I then carefully and slowly used a dremel to grind the spot welds on the lower radiator bracket to weaken them (i wanted to salvage the bracket in case I want to weld it back on and use it in the future). By working the support back and forth the welds eventually give way and pop out leaving 4 small holes. I filled these with silicone, waitied till dry, then painted.
Then it was time for radiator fitment. It turns out on the early cars you're going to need to notch the driver's side radiator support lip, and at that, barely at all. The two old radiator upper mounting brackets with their studs need to be removed, you can drill the spot welds, or you can just cut off the protrusion as they will interfere with the new radiators upper mounting bolts giving you too little clearance for the e-fan to fit between the engine and rad. Again, I drilled these in case I ever wanted to convert back. Once again, silicone in the holes, paint.
The next step is where I had some trouble and stopped for the night (it was late). The upper mounting brackets fell in beautifully on the upper rad support. The lower brackets however weren't drilled right. I've looked at some of the pictures online, but I think on the early cars there's a better way to mount the lower rad supports. There are 2 drainage holes in the front valance which are located almost exactly where the supports can go, if you toss a bolt and washer above and a locknut below through the newly shortened lower brackets, you'll get the same effect as using the self tapping screws and it's one less thing to have to do (at least that's my thoughts on the subject at this point).
I'll get some pictures up and go through the process in more detail. I'm real excited since this rad/fan is gigantic compared to the old one, and significantly larger than the volvo or civic radiator swaps.
-
Raze
Re: Allison Automotive Radiator Install...
Finally time for some feedback, but some fun stuff first:
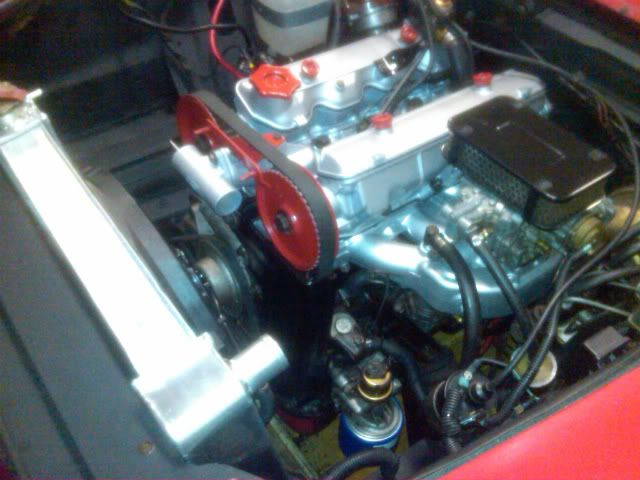
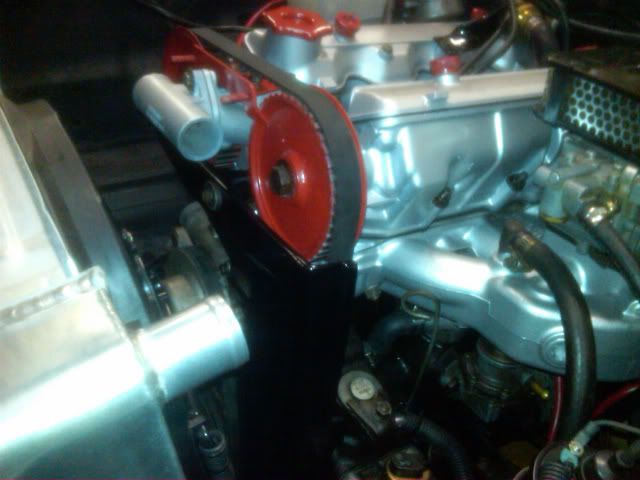
You have to cut/grind away the lip of the upper radiator support, and the brackets Allison Automotive supplied had to be heavily modified to get them even remotely close. I talked to Mark about it and it seems one of the 'new guys' made up the parts. My recommendation to Mark, pre-mark based on year, but don't pre-drill the brackets. I mean this is still a custom kit and requires modification to your spider any way you slice it. I had to make 'cutout slots' on each bracket to give enough adjust-ability to get everything lined up and spaced off of the body, sway bar and still leave clearance for the fan.
Also, I had to bias the radiator toward the driver's side rail and notch my aftermarket battery bracket (which on the early cars is in the passenger front corner of the engine bay. 3 of the brackets were able to use the self-tapping screws, though you will need to drill these as they're too large and will warp the thin sheet metal if you try to use them to cut as they're not exactly 'self-tapping'.
You will need to get at least a 3-3.5" 5/16" bolt, washer and locknut for the final hole, as the last bracket lined up with the drain hole in the lower radiator support. A quick drill from above allows for use of the brackets correctly.
Another thing is the kit comes with all parts unpainted. They are mostly low carbon steel parts so I made sure to coat them adequately before installation, I used engine enamel as it's tough as nails once properly hardened.
Final thing I can think of is you need to bias the radiator fan to the upper driver's side to maximize clearance to the water-pump pulley. This is really the only 'close' spot and still gives nearly a quarter of an inch or more.
More pictures coming, these are just a quick taste...
-
Raze
Re: Allison Automotive Radiator Install...
As promised, more photos:
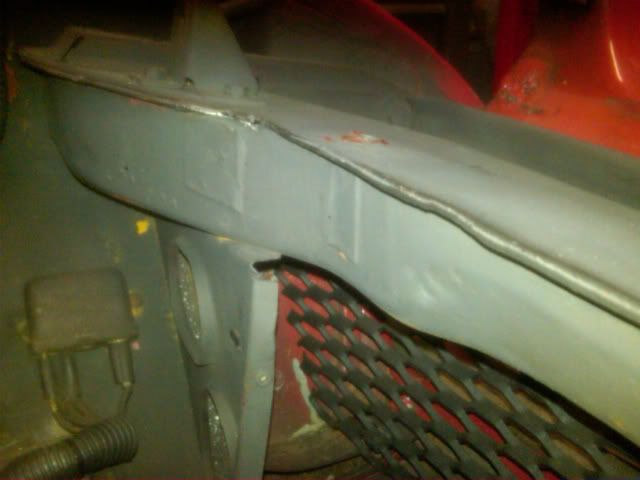
1) This is the picture of how much the radiator support needs to be notched, same goes on the other side:
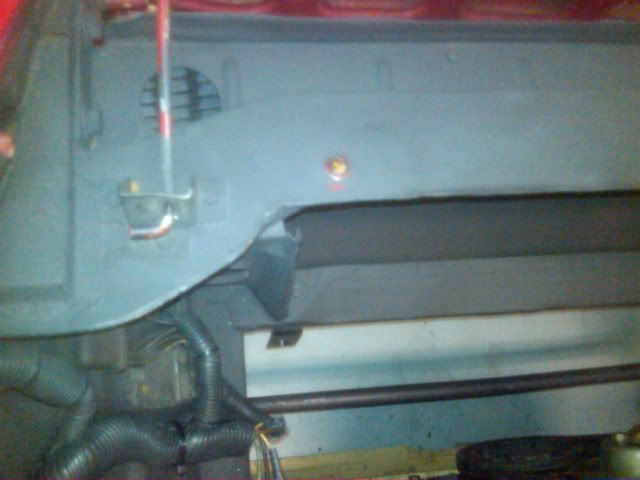
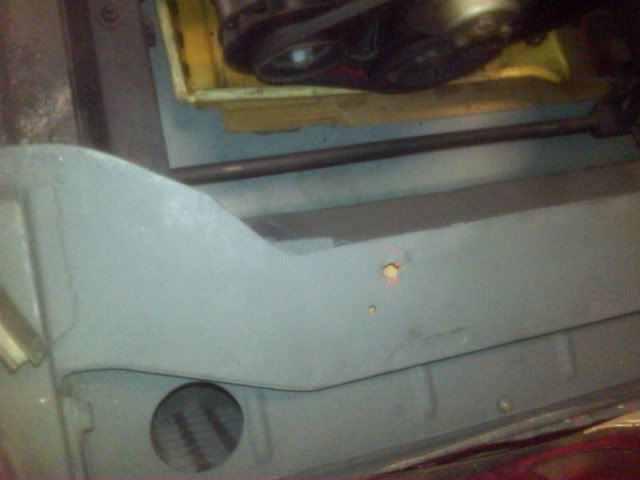
2) This is the picture of the stock upper radiator support tabs 'removed', I ended up cutting them but it was clean so they could be welded back on if desired:
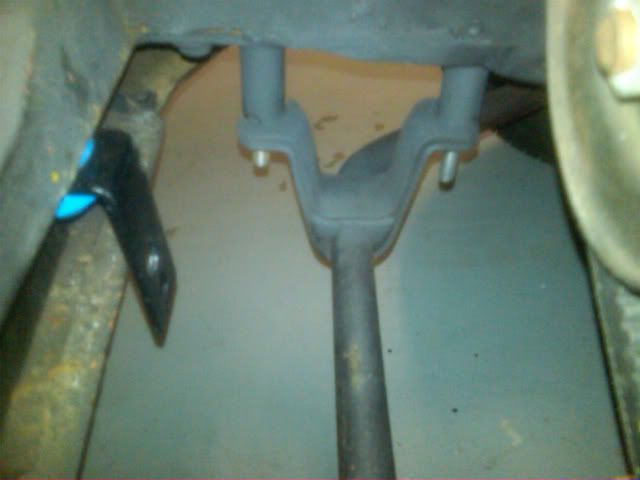
3) This shows the spacers with the kit for the sway bar (I had to trim them as they were all unequal, and also the lower radiator bracket I painted up and drilled 'correct' mounting holes into:
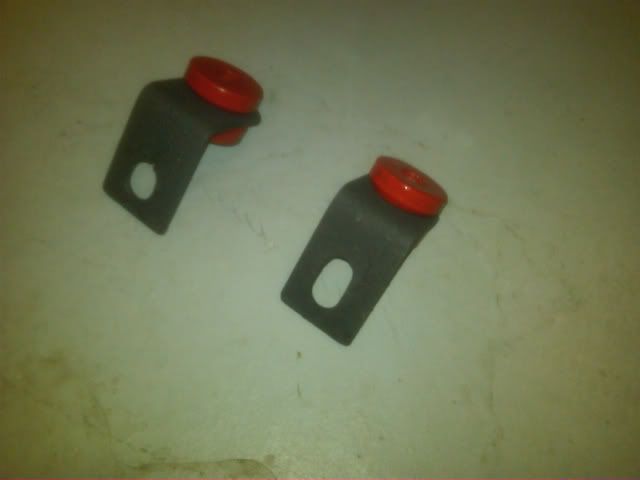
4) This shows the upper brackets, I slotted them to get enough adjustability, the holes that came pre-drilled weren't even close. I also painted the bushing to match my theme:
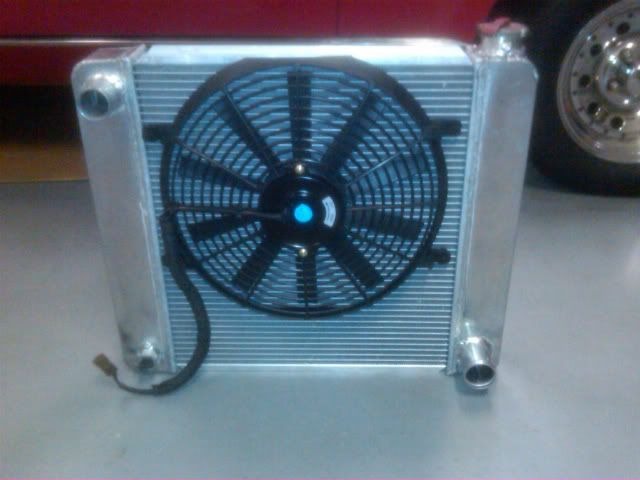
5) Radiator with e-fan attached and biased up toward the driver's side to give enough clearance on the waterpump pulley:
6) Final shots:
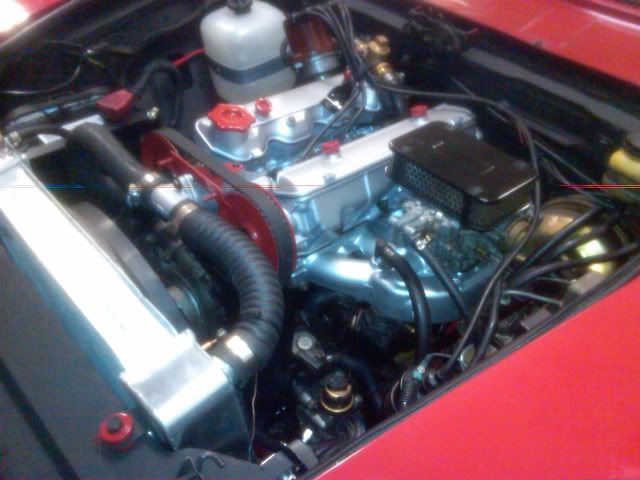
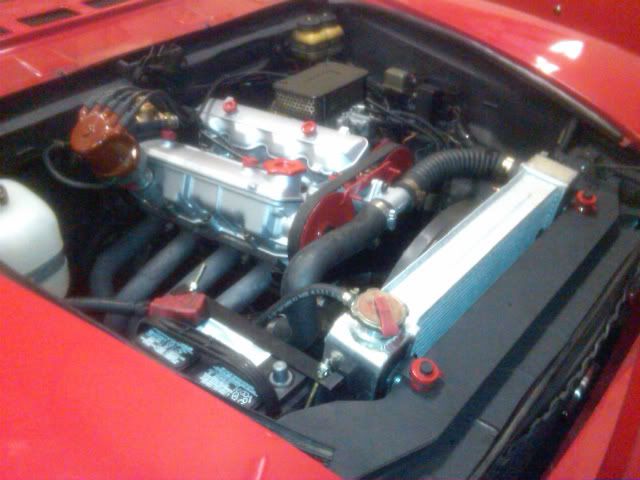
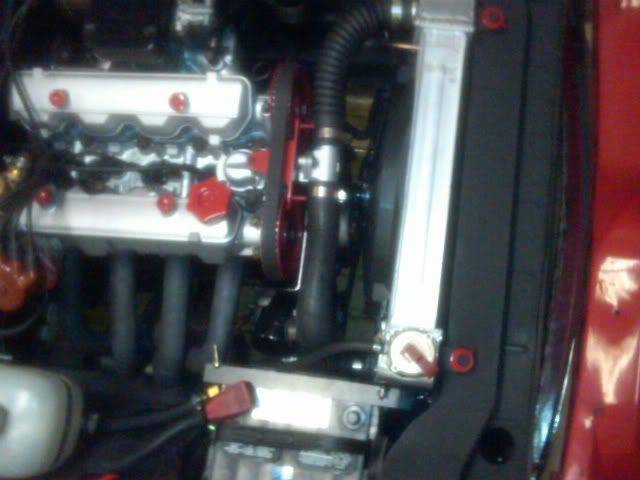
That's it!
1) This is the picture of how much the radiator support needs to be notched, same goes on the other side:


2) This is the picture of the stock upper radiator support tabs 'removed', I ended up cutting them but it was clean so they could be welded back on if desired:

3) This shows the spacers with the kit for the sway bar (I had to trim them as they were all unequal, and also the lower radiator bracket I painted up and drilled 'correct' mounting holes into:

4) This shows the upper brackets, I slotted them to get enough adjustability, the holes that came pre-drilled weren't even close. I also painted the bushing to match my theme:

5) Radiator with e-fan attached and biased up toward the driver's side to give enough clearance on the waterpump pulley:

6) Final shots:


That's it!
- courtenay
- Patron 2020

- Posts: 1321
- Joined: Mon Nov 30, 2009 11:41 pm
- Your car is a: 1980 Spider 2000
- Location: Courtenay, BC, Canada
Re: Allison Automotive Radiator Install...
Great pics, Raze. I'm going to have to install my rad one of these days, and this tutorial will help a lot. One question - is there only one bracket on the lower part of the rad? If so, does it go in the centre or side?
Between you and Jamie (wachuko) we're getting a lot of really useful "how to" lessons!
Between you and Jamie (wachuko) we're getting a lot of really useful "how to" lessons!
Bruce Shearer
'80 Spider Fi
'10 Volvo XC70
'06 GMC 1 Ton PU
'72 Spider a long, long time ago
'80 Spider Fi
'10 Volvo XC70
'06 GMC 1 Ton PU
'72 Spider a long, long time ago
-
So Cal Mark
Re: Allison Automotive Radiator Install...
two lower brackets, one on each side. The installation instructions should indicate that
-
Raze
Re: Allison Automotive Radiator Install...
Yup Mark beat me to the punch, I just didn't put the second picture up but the one with the spacers on the sway bar and lower bracket are mirrored on the other side, the radiator has 4 'bungs' welded into the tanks, 2 per side, one top, one bottom...
- courtenay
- Patron 2020

- Posts: 1321
- Joined: Mon Nov 30, 2009 11:41 pm
- Your car is a: 1980 Spider 2000
- Location: Courtenay, BC, Canada
Re: Allison Automotive Radiator Install...
Thanks, guys - I haven't looked at the instructions for awhile. When I bought the rad, I thought I had a problem. Turns out the problem was with the temp sensor not the rad. Oh well...It's in the parts cupboard and on the to-do list. Raze's pics just made the job a heck of a lot easier for a bit of a mechno-idiot.
Bruce Shearer
'80 Spider Fi
'10 Volvo XC70
'06 GMC 1 Ton PU
'72 Spider a long, long time ago
'80 Spider Fi
'10 Volvo XC70
'06 GMC 1 Ton PU
'72 Spider a long, long time ago
- tartan18
- Posts: 505
- Joined: Sun Mar 13, 2011 10:58 pm
- Your car is a: 1975 Fiat 124 Spider
- Location: Lebanon, Oregon
Re: Allison Automotive Radiator Install...
The installation of my Allison radiator was pretty straight forward. The brackets were, as mentioned, a bit of a challenge as there was precious little room to wiggle them in -- a slotted style would be a good alternative. My only problem was the limited space between the fan and the water pump pulley bolts; less than 1/4 inch. To prevent the plastic fan shroud from hitting the pulley bolts when the radiator came up to operating temperature I installed a stainless steel strap that holds the fan tight against the radiator.
This is before fitting the electric fan

Here you can see the limited distance between the electric fan shroud and the water pump pulley bolts. I am looking for bolts that would seat further into the water pump pulley.

This is before fitting the electric fan

Here you can see the limited distance between the electric fan shroud and the water pump pulley bolts. I am looking for bolts that would seat further into the water pump pulley.

Jim MacKenzie
1975 Fiat Spider
Finest Italian Automotive Technology
1975 Fiat Spider
Finest Italian Automotive Technology
-
Raze
Re: Allison Automotive Radiator Install...
I did a couple of things to increase backspacing as much as possible, but I too am concerned with how tight the spacing is. The first is I used a BFH to 'massage' the original radiator uprights that help duct air into the old radiator and is supported at the top and bottom by the radiator supports inward so they no longer impinged on the radiator, that bought me about 1/4". I also bent the lower and upper brackets to get a better angle for the top of the radiator away from the waterpump pulley. Then by biasing the radiator fan toward the top I got what I think is adequate clearance since the closest waterpump pulley bolt is 1/4" to the back of the fan shroud where the motor is. By your picture it looks as though your fan is sitting higher than mine since I've got that clearance to the motor (deepest point on the fan). I used the stock plastic zip ties with the kit and I tightened them down, are you missing your zip ties? Another thing, your fan looks really deep. Do you have the S-curve fan because if so it's too deep. I talked with Mark about this and he was switching back to the straight-blade fan which is much lower profile...
- tartan18
- Posts: 505
- Joined: Sun Mar 13, 2011 10:58 pm
- Your car is a: 1975 Fiat 124 Spider
- Location: Lebanon, Oregon
Re: Allison Automotive Radiator Install...
The fan I received is indeed the S-curve type. I've been looking at alternatives but I'll leave it alone for now unless a problem develops. At the moment I have about an eighth inch clearance between the fan and the bolts on the water pump pulley. I also did get the zip ties but they didn't secure the fan securely enough. That is why I went the route of the stainless strap. The present position of the fan is the place where I get the maximum space between the fan shroud and the water pump pulley bolts. When I pull the engine next year to get the car painted I will have the shop modify the lower cross frame to by extra clearance. There is always more tinkering than I have available time (or patience). 
Jim MacKenzie
1975 Fiat Spider
Finest Italian Automotive Technology
1975 Fiat Spider
Finest Italian Automotive Technology
- Kevin1
- Posts: 399
- Joined: Tue Feb 17, 2009 8:55 pm
- Your car is a: 1980 Spider 2000 FI
- Location: Maine, USA
Re: Allison Automotive Radiator Install...
Hi all,
I am in the process of finishing up this same radiator installation. Based on my experience with it and the comments above, a few points seem clear now....
1. It is a tight fit compared to the original radiator. The aluminum radiator is larger in every dimension so clearances on all sides will be less.
2. Turning the holes in the mounting brackets into 3/4" slots should be the first thing anyone does with the kit. It makes the rest of the installation so much easier and saves a lot of time.
3. Some grinding/trimming of the top radiator mount will be necessary. It isn't a lot, but it isn't going to work without a bit of massaging.
4. Once installed it is a pretty tidy package and the mounting feels very solid.
Apparently, no two Fiat spider bodies measure exactly alike, and as a result each installation seems to differ slightly in the details of what must be done to best make it fit. No way swapping for a differently sized radiator is going to be a drop-in replacement.
With the new radiator mounted as far forward as it could get it the fan shroud (s-blade) was brushing the crank pulley. Trimming back a small section of the shroud at the bottom gave me 1/2" between the fan blade and the pulley, which seems to be plenty. Maybe the thinner flat bladed fan would have fit without trimming. If it is thinner that would be the one to ask for when ordering a kit.
Overall, I think this is a worthwhile upgrade (since I needed a radiator anyway) that will go a long way toward addressing any overheating issues when sitting in traffic.
-
Raze
Re: Allison Automotive Radiator Install...
The nice part about this modification is you can get replacement universal radiators in this size with the same mounting holes for around $130, which means you're ahead after you have to replace 1 radiator since this kit costs the same as a new/or recored original unit... 
Other nice part was once I started running the first time after getting it installed, without the fan on at idle for nearly 15 minutes with 60 deg ambient temp, the temp gauge was barely above 190 deg, this thing seriously cools...
Other nice part was once I started running the first time after getting it installed, without the fan on at idle for nearly 15 minutes with 60 deg ambient temp, the temp gauge was barely above 190 deg, this thing seriously cools...
- Kevin1
- Posts: 399
- Joined: Tue Feb 17, 2009 8:55 pm
- Your car is a: 1980 Spider 2000 FI
- Location: Maine, USA
Re: Allison Automotive Radiator Install...
The new radiator is in with everything buttoned up and a few miles under it's belt. A couple of differences between driving with the original radiator and the new one have made themselves obvious, both of them positive. First, the car will sit and idle forever without triggering the fan, even though it was 79 degrees here yesterday. The engine warms up, the thermostat opens, and there seems to be enough coolant circulating to keep the temperature down without calling for the fan. If I keep the revs higher while sitting still the fan comes on as it should. Second, when the fan does come on it is much quieter than the original.
This setup appears to work very well!
This setup appears to work very well!
-
csi2000s
Re: Allison Automotive Radiator Install...
My Allison aluminium radiator arrived today. It looks great and is massive compared to the original unit. The only problem is that it didn't come with a radiator cap. What kind of cap will fit and where do I get one? Thanks
-
So Cal Mark
Re: Allison Automotive Radiator Install...
standard GM cap works on the rad. We're working on sourcing a competitively priced cap, but until then you can get one at any parts store